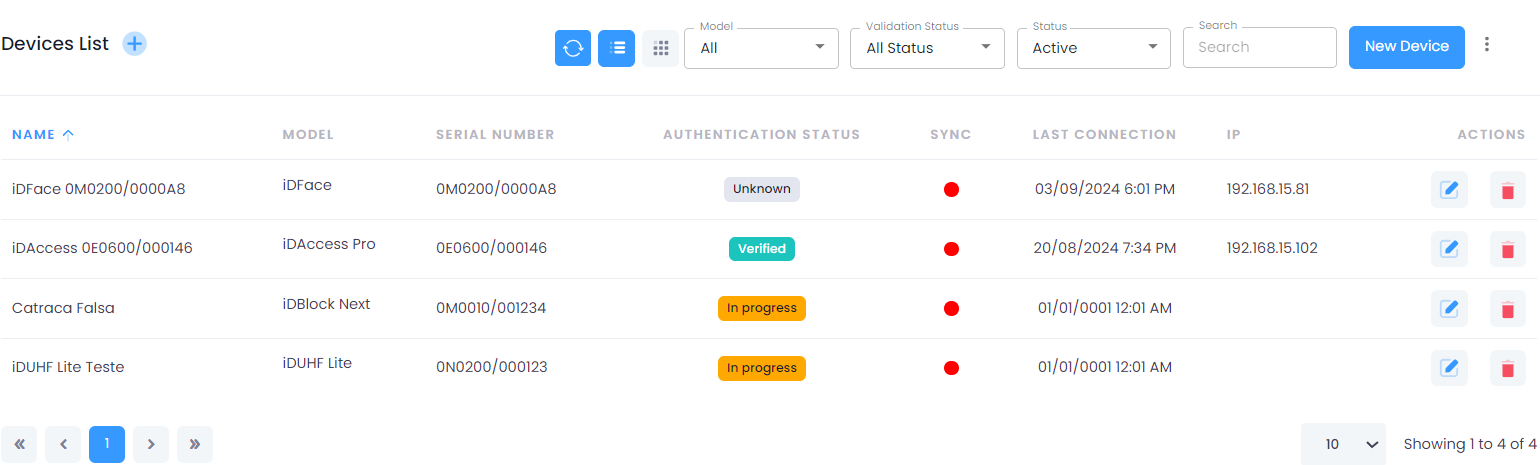
Accessing the Devices Screen
To view the devices registered in the system, navigate to the side menu and select: Access > Devices.
Currently, the system supports 19 types of devices, each with a specific serial prefix. Below is the standard initial prefix for each type:
| MODEL | PREFIX |
|---|---|
| iDAccess | 0I |
| iDAccess Nano | 0F |
| iDAccess Pro | 0E |
| iDAccess Prox | 0I |
| iDBlock | 0K |
| iDBlock Counter | 0K |
| iDBlock Articulated Arm | 0K |
| iDBlock Face | 0K |
| iDBlock PNE | 0K |
| iDBlock Next | 0M / 0G |
| iDBox | 0L |
| iDFace | 0M |
| iDFit | 0J |
| iDFlex | 0G |
| iDUHF | 0N |
| iDFace Max | 0M |
| iDUHF Lite | — |
| iDBell | — |
| iDLock | — |
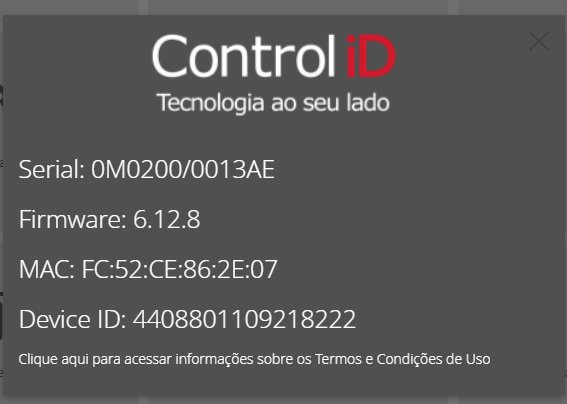
The complete serial follows the pattern: Prefix + 4 characters / 6 characters Example: 0M0200/00AAAE
- The Serial can be found on the device label or in the "About" field present in the embedded site's settings menu.
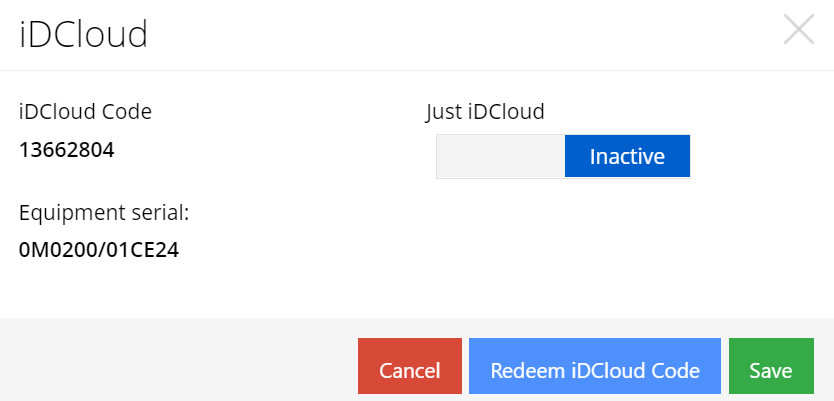
The mandatory fields for registering devices are: Name, Serial, and Verification Code.
- The Verification Code is a code with a minimum of 8 characters responsible for validating the device synchronization. Usually, this code is obtained on the settings screen of the device itself in the "iDCloud" menu or through the embedded site.
For the device synchronization to occur correctly, it is essential to verify that the network settings are correct. When the network settings are correct, the device synchronization and authentication occur automatically after registering with the correct serial and verification code.
| STATUS | COLOR |
|---|---|
| Synchronized |  |
| Synchronizing |  |
| Offline |  |
The system checks the connection every 30 seconds; if a device is offline, the status color will turn red.
Registering and Editing Devices
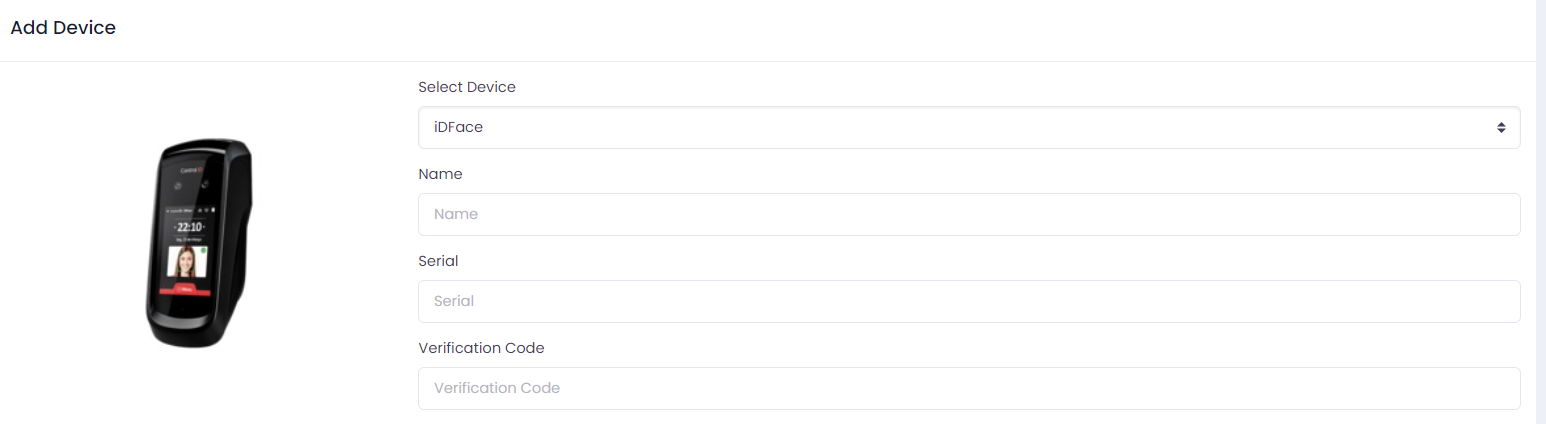
All devices have the same standard registration form:
- Select the device type.
- Fill in the 'Name' field.
- Fill in the Serial field with the valid serial corresponding to the device.
- Fill in the Verification Code field with a valid code corresponding to the device.
- Access | Face | Fit | Flex
The iDAccess, iDAccess Nano, iDAccess Prox, iDFace, iDFit, and iDFlex devices have the same registration fields.
Reader Tab
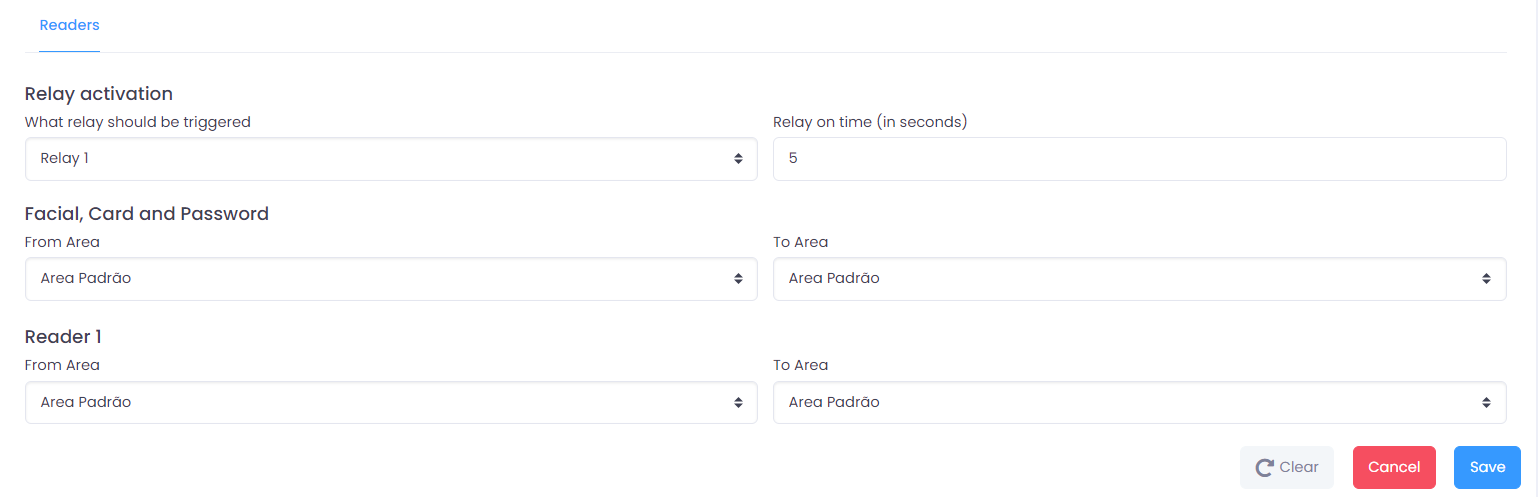
In this tab, you can configure the initial settings for the selected device, such as the relay and its activation time in seconds, as well as the origin and destination area.
When editing these devices, you will notice that new tabs will appear:
Advanced Actions Tab
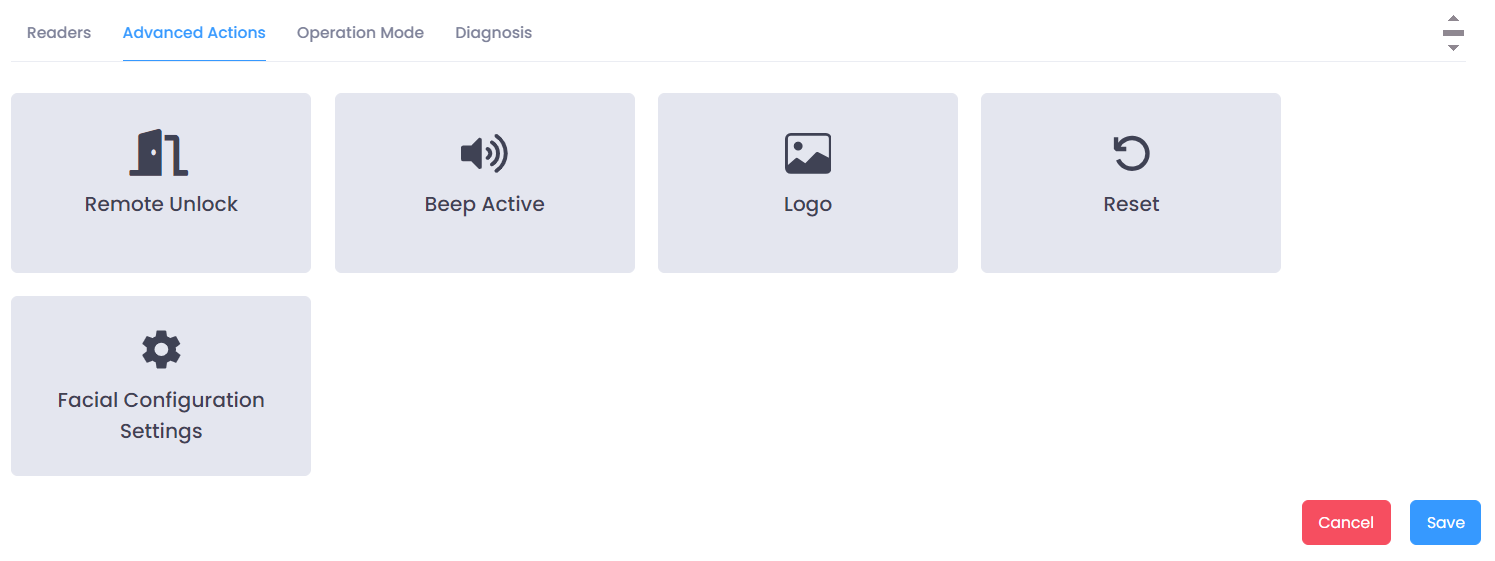
The advanced actions tab has 6 action buttons:
- Open Door: Sends the command to the device to open the door.
- Active Beep: Activates/Deactivates the device sounds.
- Logo: Allows inserting or removing a logo on the device.
- Restart: Sends the command to restart the device.
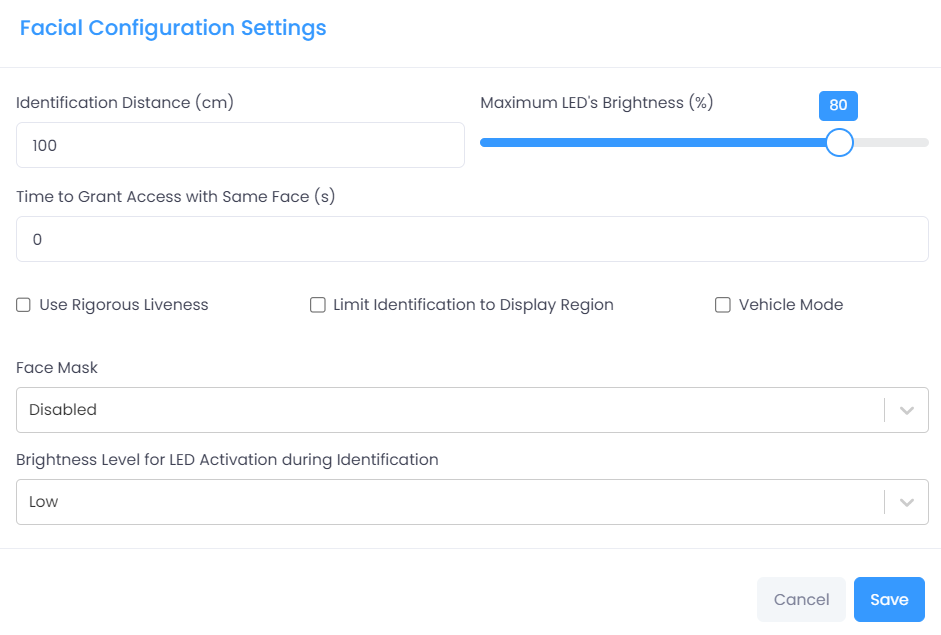
- Facial Settings: Allows configuring facial access on the device.
- Identification Mode: Allows the configuration of the equipment's operation mode between 1:1 and 1:N
Note: Some devices do not have the facial access functionality, so this tab may not be available.
Operating Mode Tab
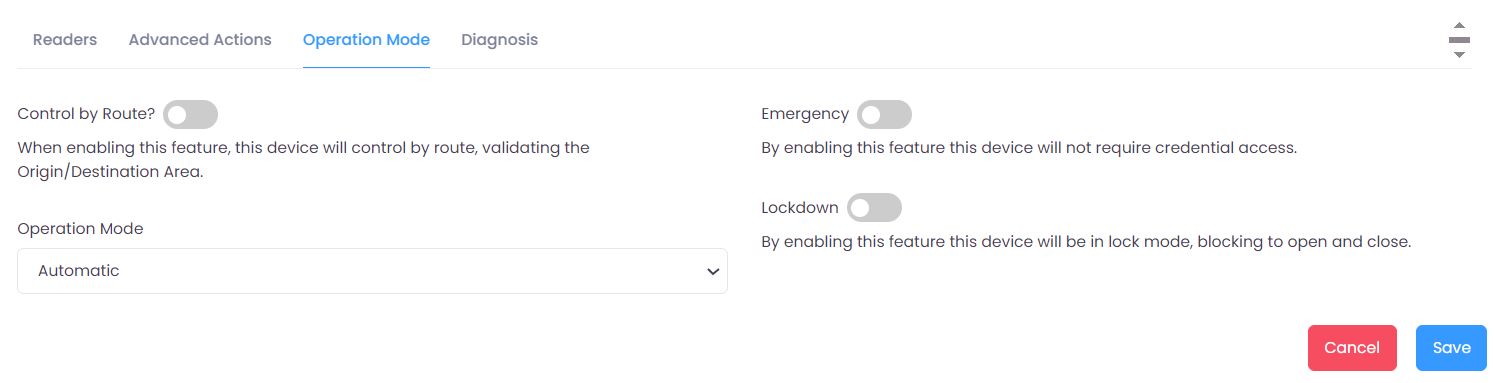
In this tab, you can configure the device's operating mode with the following toggles:
- Route Control: When this feature is enabled, this device will perform route control, validating the Origin/Destination Area.
- Emergency: When this feature is enabled, this device will not require access credentials.
- Lockdown: When this feature is enabled, this device will enter a closed mode, blocking any access.
- Operation Mode:
- Automatic: Based on the settings, the system will automatically set the mode of operation.
- Standalone: When forcing the equipment to Standalone mode, some system features will not work on this equipment, such as route control, anti-double entry control, credit control, random search.
- Online: When forcing the equipment to Online mode, the system may take longer to perform authorizations, especially if there is instability or slowness in the network.
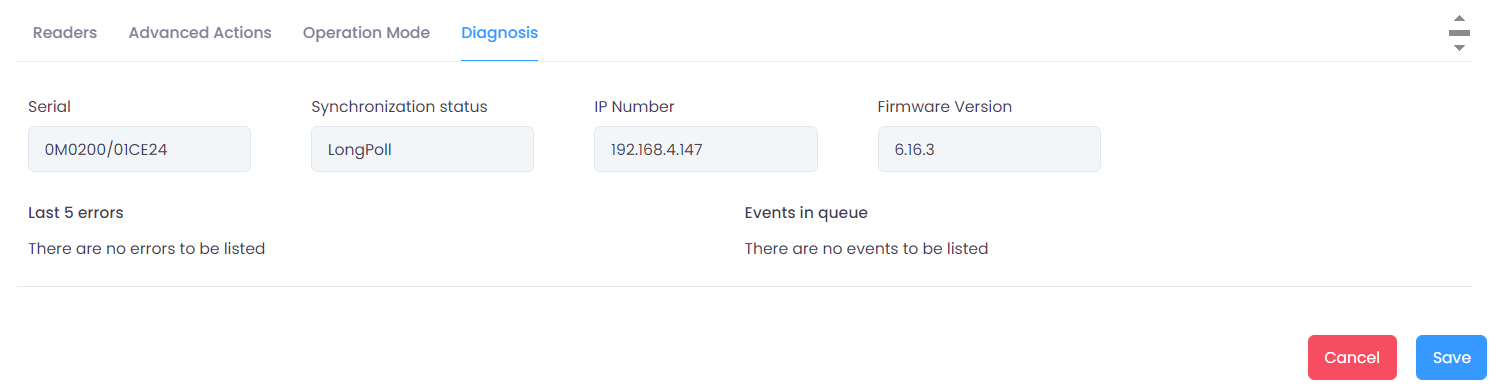
Diagnosis Tab
In this tab, you can view more information about synchronization, last errors, and events on the device.
- Block | Block Counter | Block Articulated Arm | Block PNE
The iDBlock, iDBlock Counter, iDBlock Articulated Arm, iDBlock PNE devices have the same registration fields.
Reader Tab
In this tab, you can configure the turnstile rotation, set the origin and destination area, as well as characteristics such as entry rotation direction and estimated abandonment time.
Device Settings Tab
In this tab, you configure the device with the toggles:
Urn Control: - Has an urn? - Allow visitors to leave without using an urn?
Entry Control: - Anti Tailgating
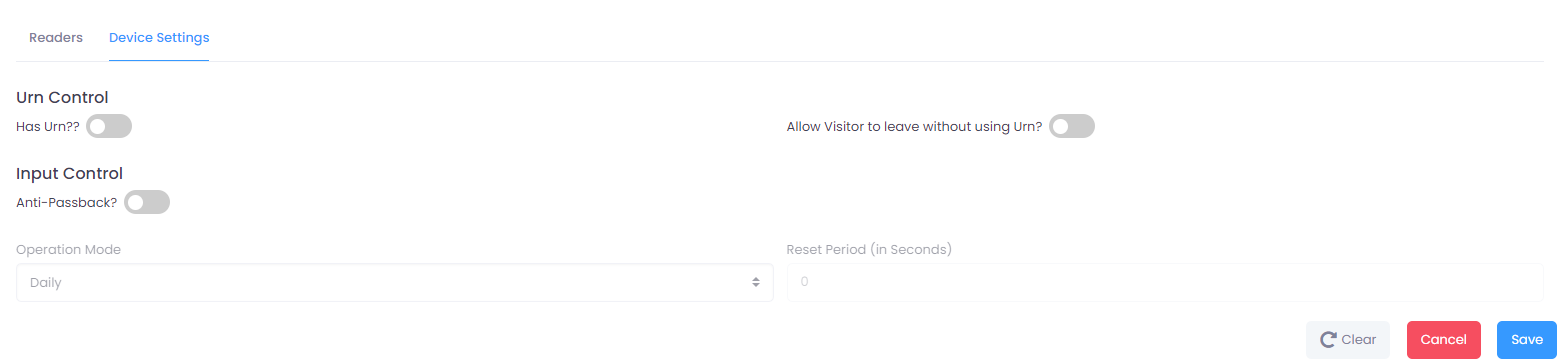
Fields activated when Anti Tailgating is enabled: - Operating Mode: Daily or Timed - Reset Period in seconds
Advanced Actions Tab

The advanced actions tab has 5 action buttons:
- Release Passage: Sends the command to the device to release the user's passage.
- Active Beep: Activates/Deactivates the device sounds.
- Logo: Allows inserting or removing a logo on the device.
- Restart: Sends the command to restart the device.
- Identification Mode: Allows the configuration of the equipment's operation mode between 1:1 and 1:N
Operating Mode Tab
In this tab, you can configure the device's operating mode with the following toggles:
- Route Control: When this feature is enabled, this device will perform route control, validating the Origin/Destination Area.
- Emergency: When this feature is enabled, this device will not require access credentials.
- Lockdown: When this feature is enabled, this device will enter a closed mode, blocking any access.
- Operation Mode:
- Automatic: Based on the settings, the system will automatically set the mode of operation.
- Standalone: When forcing the equipment to Standalone mode, some system features will not work on this equipment, such as route control, anti-double entry control, credit control, random search.
- Online: When forcing the equipment to Online mode, the system may take longer to perform authorizations, especially if there is instability or slowness in the network.
Diagnosis Tab
In this tab, you can view more information about synchronization, last errors, and events on the device.
- iDBlock Facial
Note that in this type of device, there is an additional area for entering serial and verification codes. This happens because the iDBlock Facial can be equipped with two iDFaces.
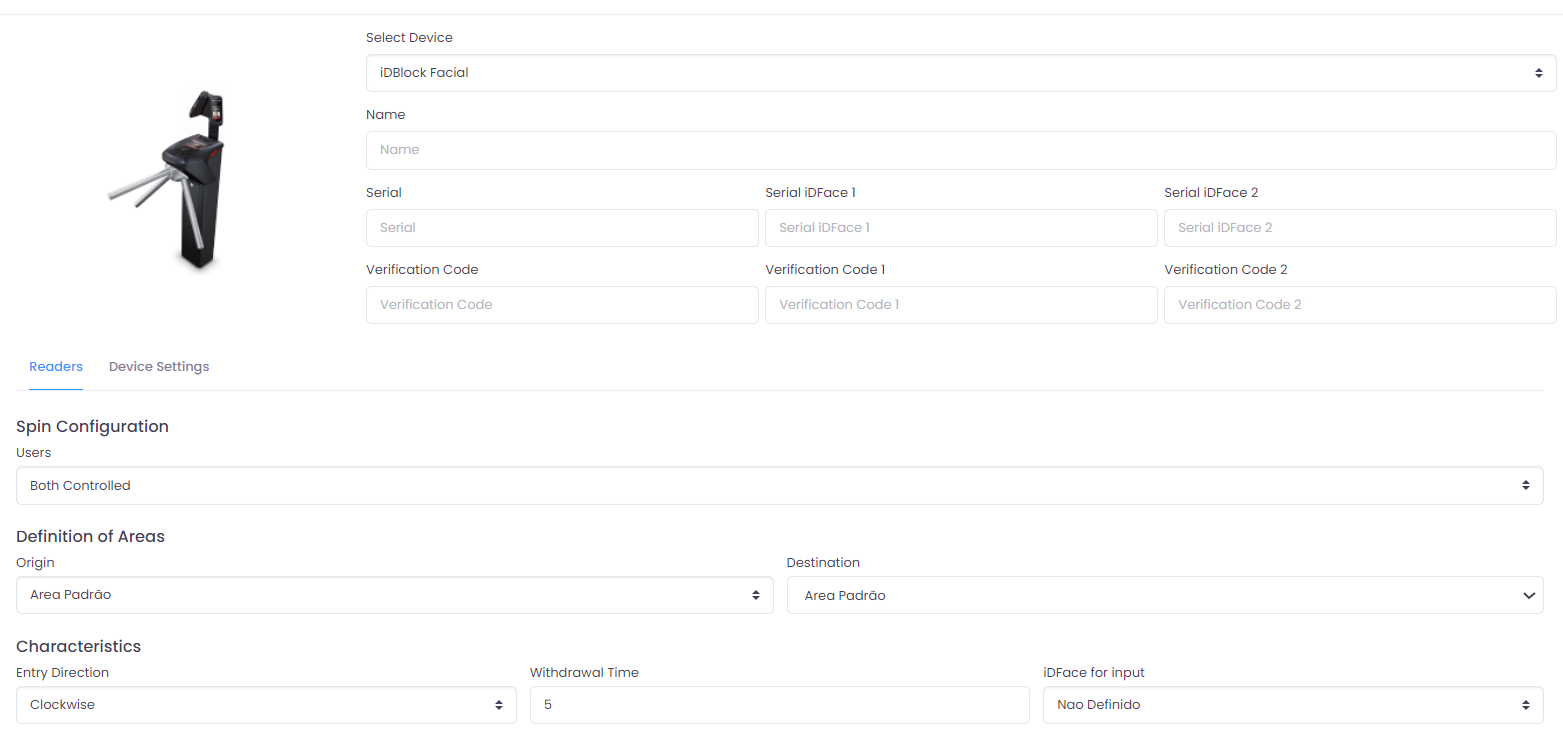
Reader Tab
In this tab, you can configure the initial settings for the selected device, such as rotation configuration, origin and destination area, entry direction, abandonment time, and define which iDFace will be used for entry.
Device Settings Tab
In this tab, you configure the device with the toggles:
Urn Control: - Has an urn? - Allow visitors to leave without using an urn?
Entry Control: - Anti Tailgating
When editing these devices, you will notice that new tabs will appear:
Advanced Actions Tab
The advanced actions tab has 7 action buttons:
- Release Passage: Sends the command to the device to release the user's passage.
- Active Beep: Activates/Deactivates the device sounds.
- Logo: Allows inserting or removing a logo on the device.
- Restart: Sends the command to restart the device.
- iDFace 1 Settings: Allows configuring facial access on iDFace 1.
- iDFace 2 Settings: Allows configuring facial access on iDFace 2.
- Identification Mode: Allows the configuration of the equipment's operation mode between 1:1 and 1:N
Note: Some devices do not have the facial access functionality, so this tab may not be available.
Operating Mode Tab
In this tab, you can configure the device's operating mode with the following toggles:
- Route Control: When this feature is enabled, this device will perform route control, validating the Origin/Destination Area.
- Emergency: When this feature is enabled, this device will not require access credentials.
- Lockdown: When this feature is enabled, this device will enter a closed mode, blocking any access.
- Operation Mode:
- Automatic: Based on the settings, the system will automatically set the mode of operation.
- Standalone: When forcing the equipment to Standalone mode, some system features will not work on this equipment, such as route control, anti-double entry control, credit control, random search.
- Online: When forcing the equipment to Online mode, the system may take longer to perform authorizations, especially if there is instability or slowness in the network.
Diagnosis Tab
In this tab, you can view more information about the device state, last errors, and events recorded.
- iDBlock Next
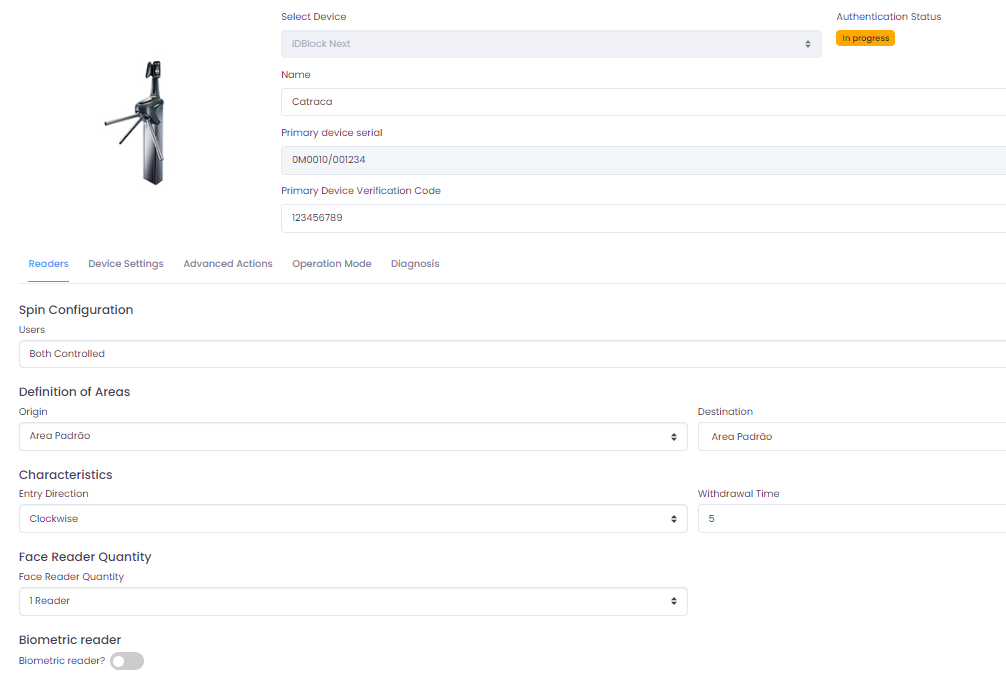
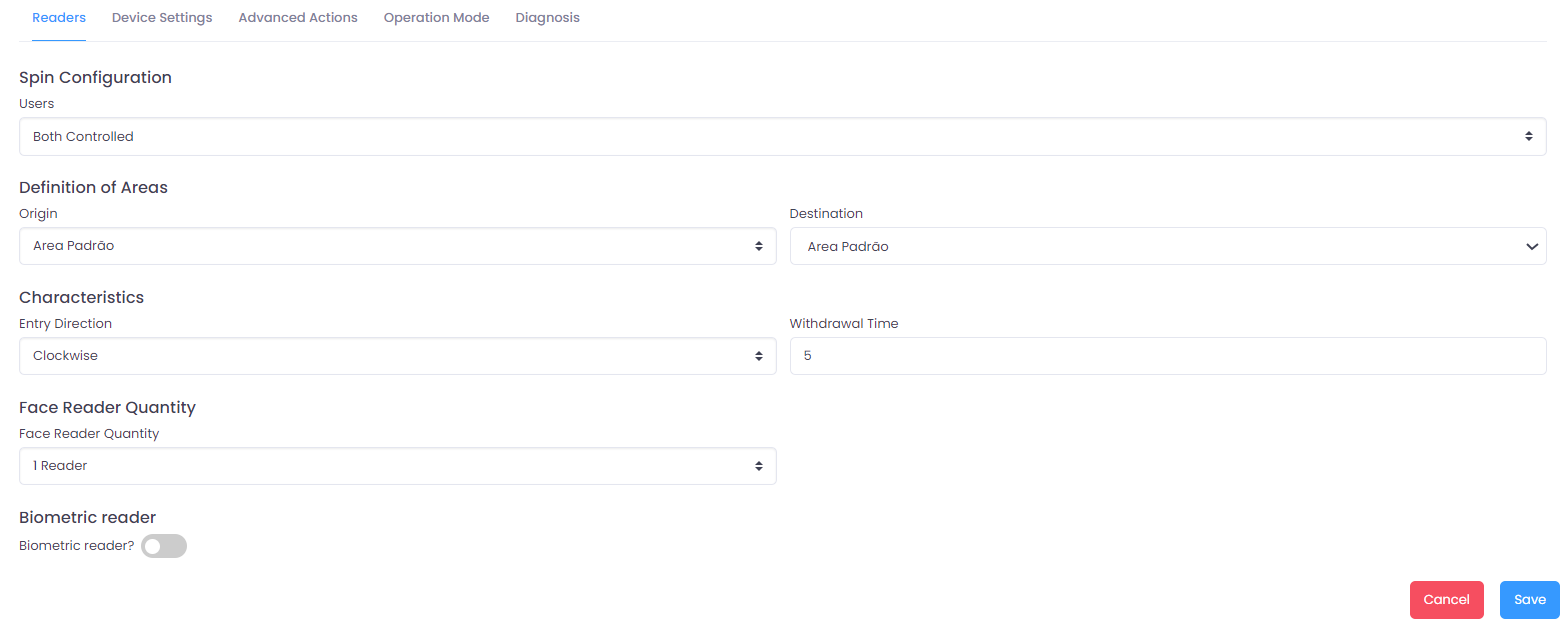
Reader Tab
In this tab, you can configure the initial settings for the selected device, such as rotation configuration, origin and destination area, entry direction, abandonment time, the number of Facial Readers, and whether it has a Biometric Reader.
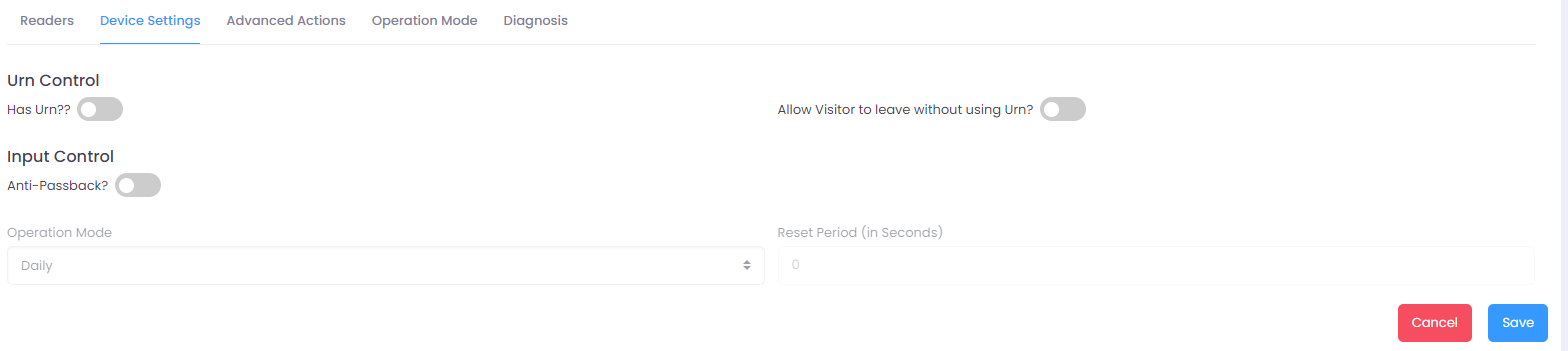
Device Settings Tab
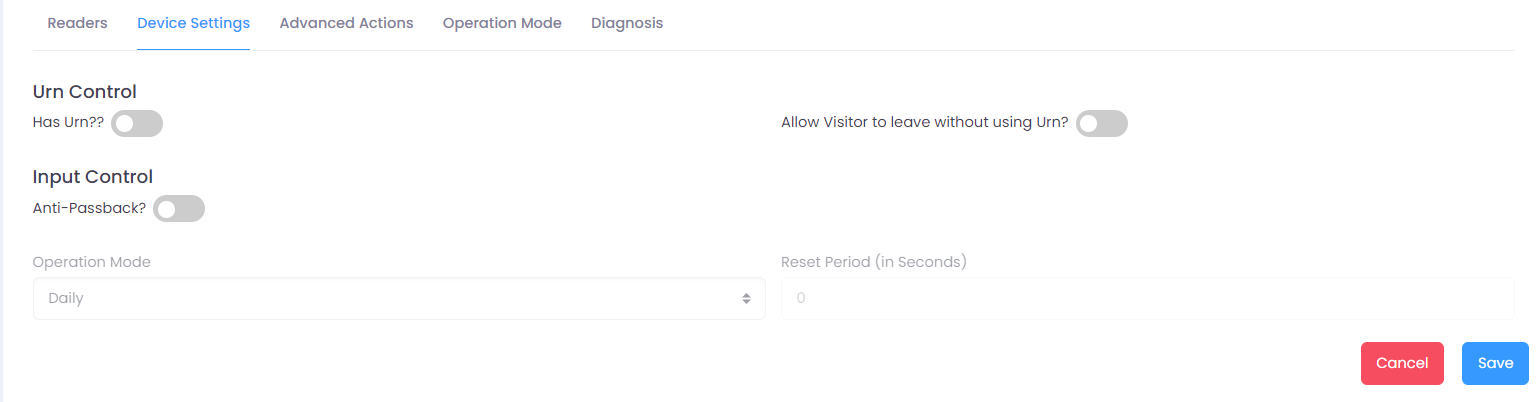
In this tab, you configure the device with the toggles:
Urn Control: - Has an urn? - Allow visitors to leave without using an urn?
Entry Control: - Anti Tailgating
When editing this device, you will notice that new tabs will appear:
Advanced Actions Tab
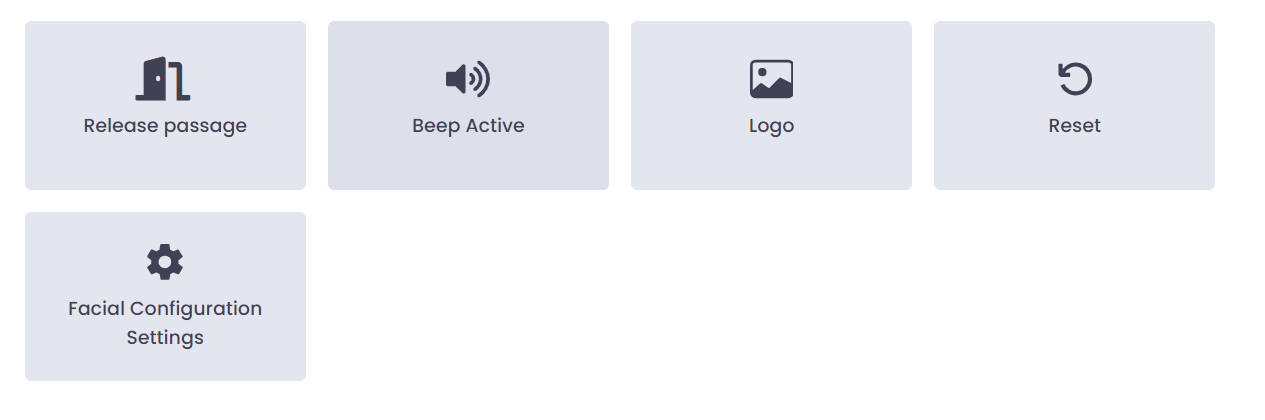
The advanced actions tab has 6 action buttons:
- Open Door: Sends the command to the device to open the door.
- Active Beep: Activates/Deactivates the device sounds.
- Logo: Allows inserting or removing a logo on the device.
- Restart: Sends the command to restart the device.
- Facial Settings: Allows configuring facial access on the device.
- Identification Mode: Allows the configuration of the equipment's operation mode between 1:1 and 1:N
Note: Some devices do not have the facial access functionality, so this tab may not be available.
Operating Mode Tab
In this tab, you can configure the device's operating mode with the following toggles:
- Route Control: When this feature is enabled, this device will perform route control, validating the Origin/Destination Area.
- Emergency: When this feature is enabled, this device will not require access credentials.
- Lockdown: When this feature is enabled, this device will enter a closed mode, blocking any access.
- Operation Mode:
- Automatic: Based on the settings, the system will automatically set the mode of operation.
- Standalone: When forcing the equipment to Standalone mode, some system features will not work on this equipment, such as route control, anti-double entry control, credit control, random search.
- Online: When forcing the equipment to Online mode, the system may take longer to perform authorizations, especially if there is instability or slowness in the network.
Diagnosis Tab
In this tab, you can view more information about synchronization, last errors, and events on the device.
- iDBox
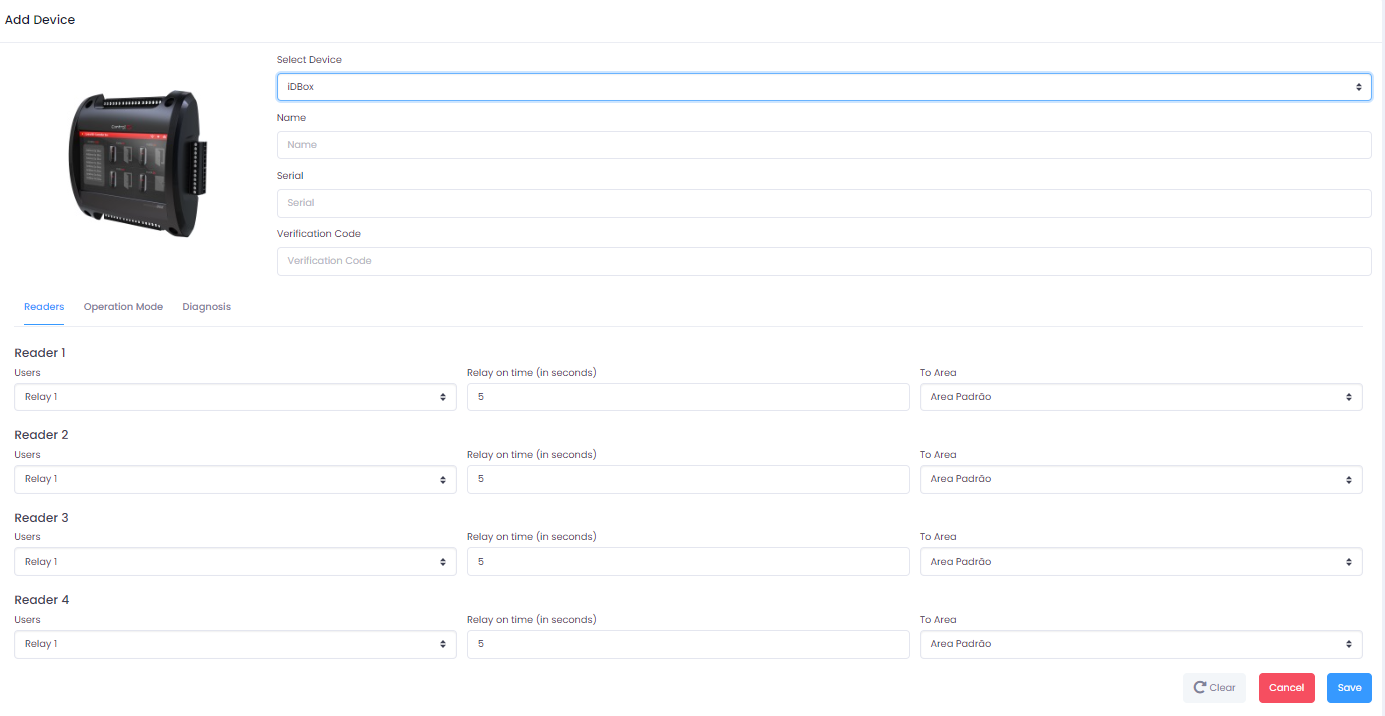
Reader Tab
The iDBox is a multifunctional access controller, and in this tab, you can configure the 4 readers by setting the Relay, Relay activation time in seconds, and the destination area.
Diagnosis Tab
In this tab, you can view more information about synchronization, last errors, and events on the device.
- iDUHF
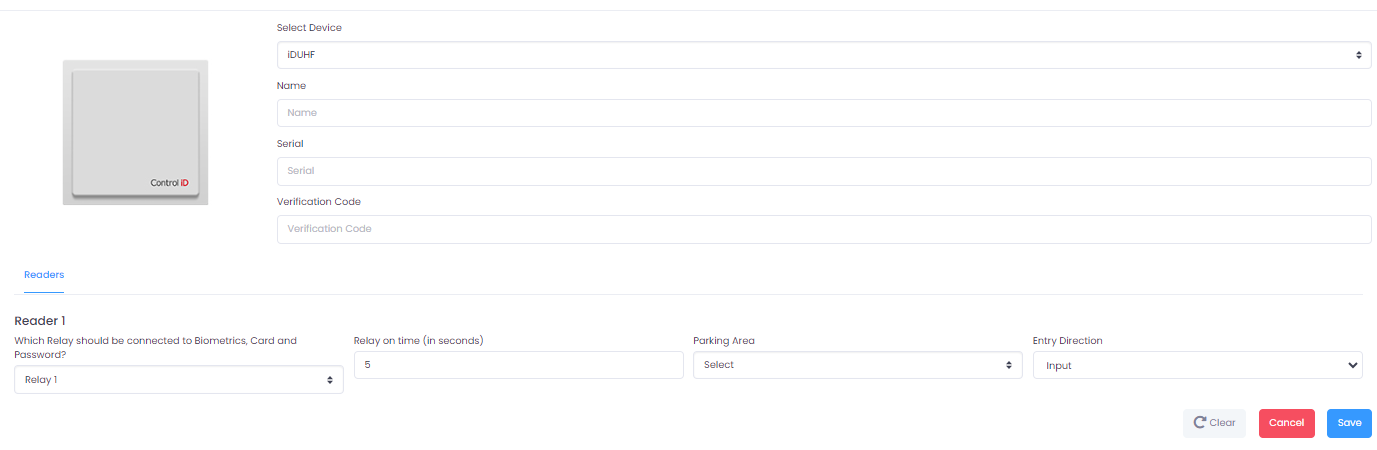
Reader Tab
In this tab, you should select which relay should be linked to Biometrics, card, or password, as well as the activation time and the Parking Area.
When editing this device, you will notice that new tabs will appear:
Advanced Actions Tab
The advanced actions tab has 5 action buttons:
- Open Door: Sends the command to the device to open the door.
- Active Beep: Activates/Deactivates the device sounds.
- Logo: Allows inserting or removing a logo on the device.
- Restart: Sends the command to restart the device.
- Identification Mode: Allows the configuration of the equipment's operation mode between 1:1 and 1:N
Operating Mode Tab
In this tab, you can configure the device's operating mode with the following toggles:
- Route Control: When this feature is enabled, this device will perform route control, validating the Origin/Destination Area.
- Emergency: When this feature is enabled, this device will not require access credentials.
- Lockdown: When this feature is enabled, this device will enter a closed mode, blocking any access.
- Operation Mode:
- Automatic: Based on the settings, the system will automatically set the mode of operation.
- Standalone: When forcing the equipment to Standalone mode, some system features will not work on this equipment, such as route control, anti-double entry control, credit control, random search.
- Online: When forcing the equipment to Online mode, the system may take longer to perform authorizations, especially if there is instability or slowness in the network.
Diagnosis Tab
In this tab, you can view more information about synchronization, last errors, and events on the device.
- iDFace Max
The iDFace Max is an enhanced version of the iDFace with greater facial recognition capacity and performance.
Reader Tab
In this tab, you configure the relay, activation time, origin area, and destination area.
When editing this device, the following tabs become available:
Device Settings Tab
Allows configuring Route Control toggle and other operation options.
Advanced Actions Tab
The advanced actions tab has the following buttons:
- Active Beep: Activates/Deactivates the device sounds.
- Logo: Allows inserting or removing a logo on the device.
- Restart: Sends the command to restart the device.
- Facial Settings: Allows configuring facial access on the device.
- Update Firmware: Starts the device firmware update process.
Operating Mode Tab
Same as the iDFace family — allows configuring Route Control, Emergency, Lockdown, and Operation Mode (Automatic/Standalone/Online).
- iDUHF Lite
The iDUHF Lite is a compact version of the iDUHF for reading UHF RFID tags in parking areas and vehicle access control.
Reader Tab
Allows configuring the relay linked to tag reading, the activation time, and the associated parking area.
When editing this device, the following tabs become available:
Device Settings Tab
Allows configuring Anti Tailgating and reader operation mode options.
Advanced Actions Tab
- Active Beep: Activates/Deactivates the device sounds.
- Restart: Sends the command to restart the device.
- Update Firmware: Starts the device firmware update process.
Operating Mode Tab
Allows configuring Route Control, Emergency, Lockdown, and Operation Mode.
- iDBell
The iDBell is an intercom device with credential reading, allowing visitors to identify themselves before access is released.
Reader Tab
Allows configuring the relay, activation time, and destination area.
When editing this device, the following tabs become available:
Call Forwarding Tab
Allows configuring which extension or operator iDBell calls will be forwarded to.
Advanced Actions Tab
- Open Door: Sends the command to open the door.
- Restart: Sends the command to restart the device.
- Update Firmware: Starts the device firmware update process.
- iDLock
The iDLock is a smart lock with Wi-Fi connectivity, ideal for environments without network cabling.
Reader Tab
Allows configuring the relay, origin and destination area, and the credentials accepted by the lock.
When editing this device, the following tabs become available:
Advanced Actions Tab
- Open Door: Sends the command to open the door.
- Restart: Sends the command to restart the device.
- Update Firmware: Starts the device firmware update process.
Updating a Device's Firmware
The iDFace Max, iDUHF Lite, iDBell, and iDLock devices support firmware updates directly from iDSecure. The process is carried out in the Advanced Actions tab of the respective device.

How to update
- In the device list, click the Pencil icon of the desired device.
- Go to the Advanced Actions tab.
- Click Update Firmware.
- In the confirmation window, click Confirm to start the update.
- A progress bar is displayed indicating the update progress. Wait for it to complete without closing the screen.
Update status
| Status | Meaning |
|---|---|
| Waiting for device | Command sent; the device has not yet started downloading |
| In Progress (X%) | Firmware download in progress |
| Success | Update completed successfully |
| Failure | Error during the update; check connectivity and try again |
| (no progress bar) | Device is already on the latest version |
Caution: The device must be online at the time of the update. Do not turn off or restart the device while the progress bar is active.
Editing a Device
To edit an existing device, click the Pencil icon corresponding to the record you want to edit. You will be redirected to the Edit Screen, where you can make the desired modifications.
After filling in all the information and selecting the desired settings, click the Save button to confirm the registration or the changes made. If you want to cancel the operation, click the Cancel button to return to the previous screen without saving the changes.
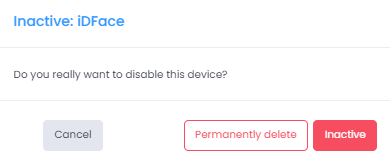
Deactivating or Deleting a Device
Click the Trash icon in the row of the record you want to deactivate or delete. A dialog box will appear with two options:
-
Inactive: Deactivates the selected device, which will no longer appear in the active list but will remain in the database.
-
Delete permanently: Performs a 'fake delete,' marking the record as deleted in the database without physically removing it.
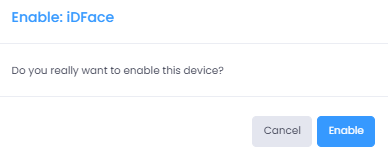
Activating a Device
Activating an inactive device is a simple process. First, filter by Inactive. This will display the list of devices that are currently inactive.
Locate the record you want to activate and click the ✔️ icon to activate it. A dialog box will appear to confirm or cancel the operation.
Selecting the Number of Records Displayed
At the bottom of the screen, use the selector to choose how many records you want to view at a time. The options are: 10, 20, 50, and 100
Viewing and Navigating Between Records
The bottom of the screen also shows the count of displayed records and the total number of registered records.
Use the pagination controls to navigate between record pages. The navigation options include:
<<and>>to go to the First or Last page.<and>to Advance or Go Back a page.[1][2]...[N]page indicators to click and access directly.
