Accessing the Access Monitoring Screen
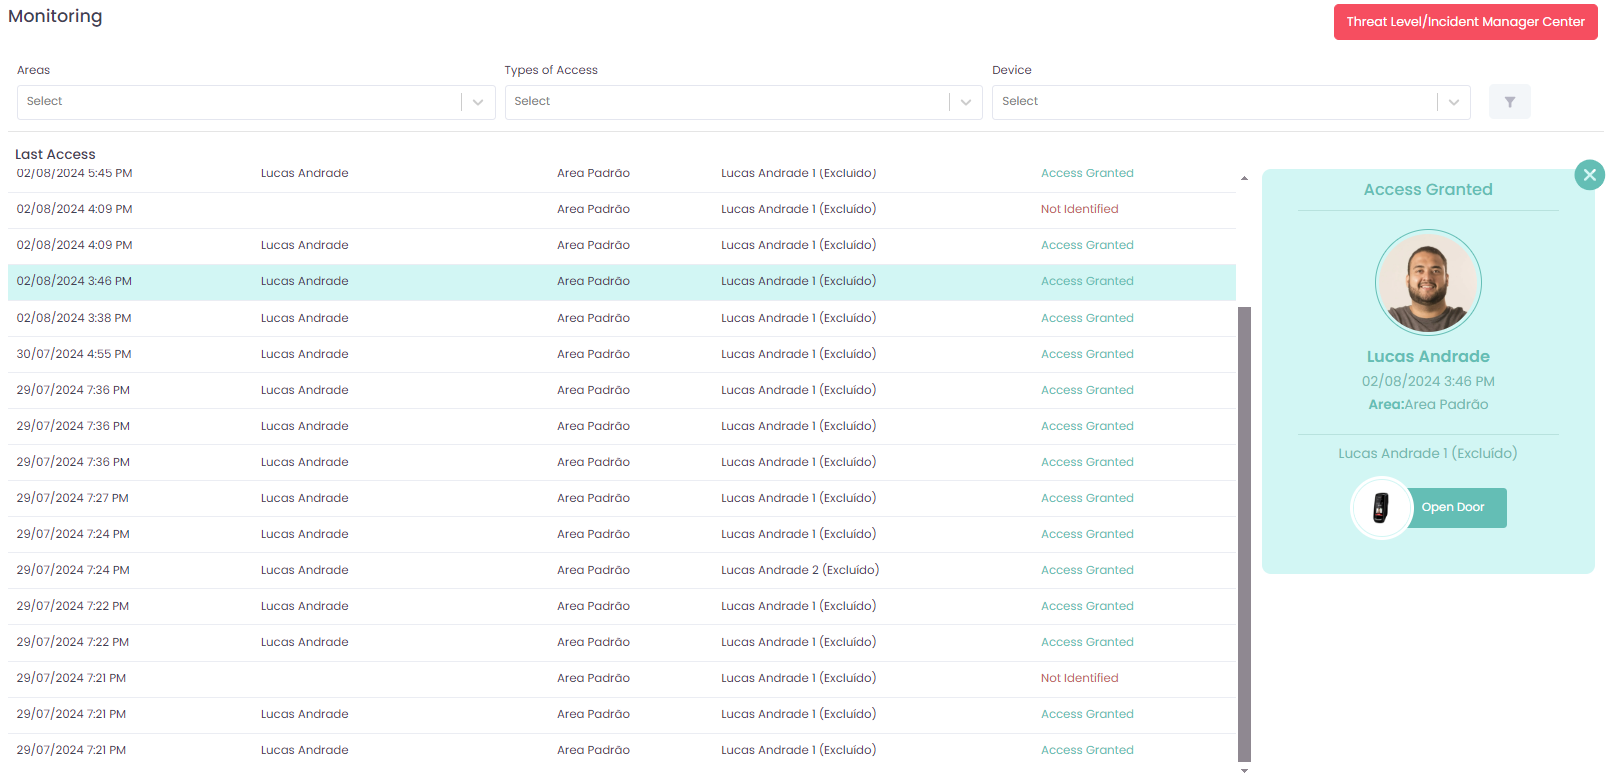
To view access monitoring, navigate via the side menu: Access Monitoring.
Filtering Accesses
Three filter options are available for a more refined view:
- Areas: Select the desired area to display only accesses related to it.
- Access Types: Filter by event type. Available types are:
| Type | Description |
|---|---|
| Access Granted | Access authorized normally |
| Button Access | Access released manually via button |
| Web Interface Access | Access remotely released through the system |
| Intercom Access | Access authorized by operator via intercom |
| Person Not Identified | The device did not recognize the credential |
| Access Pending | Access awaiting approval |
| Identification Timeout | The identification time limit was exceeded |
| Access Denied | Access blocked by access rules |
| ID Not Found | The credential had no match in the system |
- Devices: Select a specific device to filter the accesses recorded on it.
Area, access type, and device filters are automatically persisted between sessions. To clear them, click the Clear button.
Column Selector
At the top right of the access list, the Select Columns button opens a modal that allows you to enable or disable which columns are shown in the table. Available columns are:
- Date and Time
- Name
- Area
- Device
- Registration Number
- Authorization
The selection is automatically saved and maintained for future sessions.
Details Panel and Random Inspection
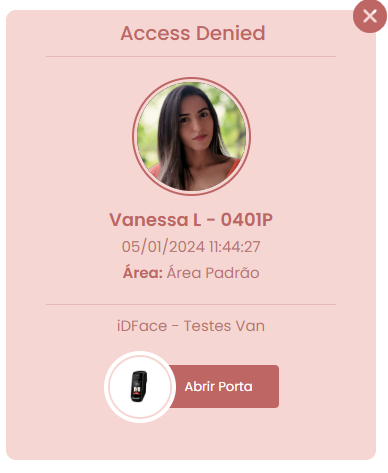
Clicking a record in the list, or when a new event arrives, a panel on the right side of the screen shows complete information:
- Access Status: Authorized or denied, visually indicated by color.
- Photo and Name: Person's image (when available) and name.
- Area: Area where the access occurred.
- Device: Equipment that registered the event.
- Date and Time: Exact moment of the activity.
The Open Door button in the panel allows you to manually send the command to the device to release the passage.
Random Inspection: When an access rule has random inspection configured and an access is selected for inspection, a Release button appears in the authorization column of the list. Click this button to approve the passage after physically inspecting the user.
To close the panel, click the X icon at the top right of the panel.
Exporting Access Records
The Access Monitoring screen allows you to export the displayed records to a CSV file. Configure the filters before exporting, then click the export button to download the file.
Note: The export respects the applied filters — configure Area, Access Type, and Device to retrieve only the desired records.
Note: The list is automatically updated in real time and keeps up to 100 records visible simultaneously. The page remains synchronized even when navigating to other browser tabs.
Threat Level/Incident Manager Center
At the top corner of the screen, the red button provides access to the Threat Level/Incident Manager Center, a powerful tool for immediate control over all access devices in the system.
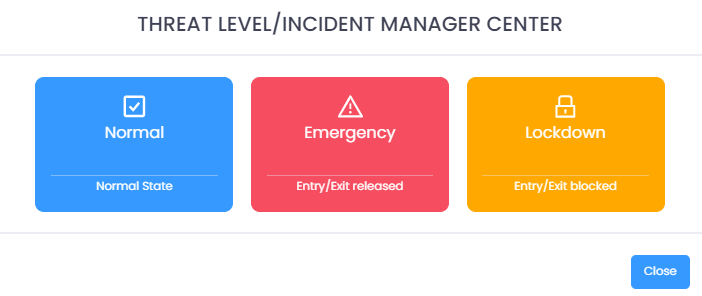
In this center, you can perform specific actions in response to different operational needs or security situations.
- Normal: This is the default access state. All operations occur according to normal settings, allowing entry and exit based on established conditions.
- Emergency: Selecting this state immediately opens entry and exit. This option is crucial in emergency situations, facilitating evacuation or ensuring quick access when necessary.
- Lockdown: The lockdown state blocks both entry and exit. This measure is activated in critical situations to completely restrict access, providing enhanced security.