Accessing the Access Rules Screen
To view the rules registered in the system, navigate to the side menu and select: Access > Access Rules.
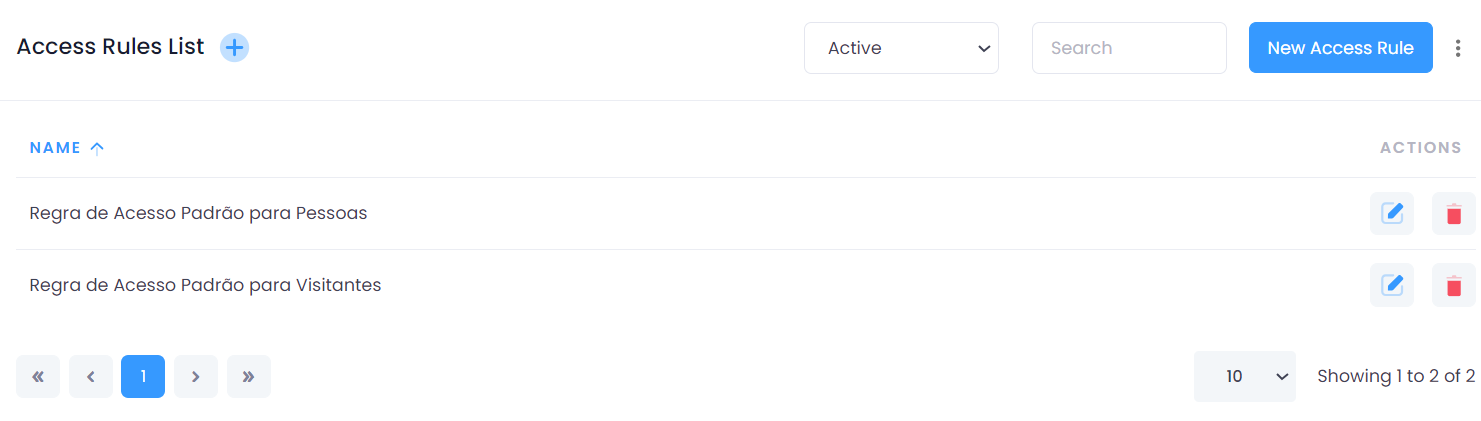
Filtering Rules
Use the Active filter at the top of the screen to filter the rules. The available options are:
- All: Shows all registered rules.
- Active: Lists only the active rules.
- Inactive: Displays the rules that have been deactivated.
Searching Rules
In the Search field, type part of the rule name you want to find. The results matching your search will be automatically displayed in the list.
Adding an Access Rule
To add a new access rule, you can:
- Click the
New Access Rulebutton. - Or click the
+(plus) icon located at the top of the screen.

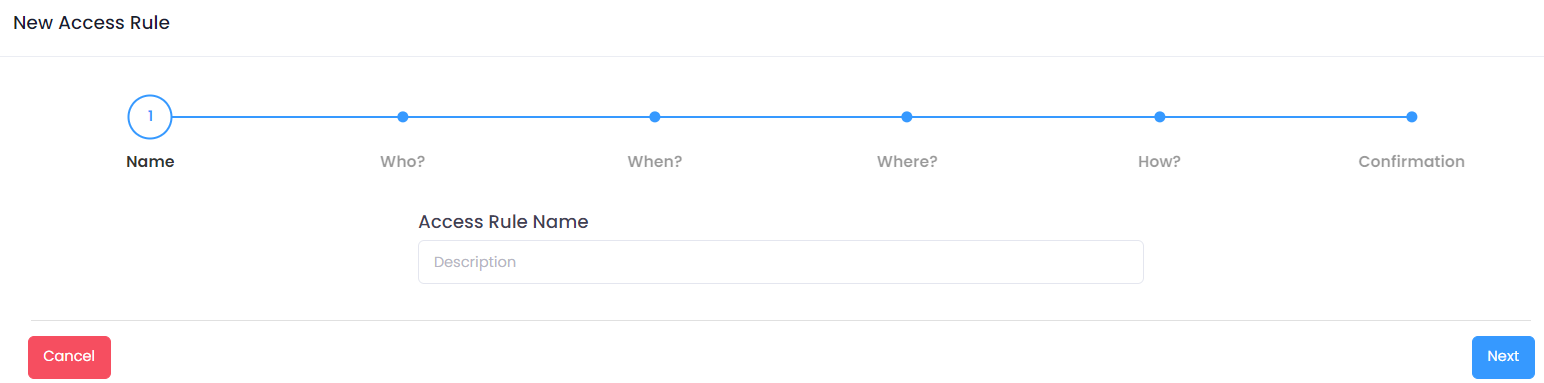
Registering access rules in iDSecure is a detailed process divided into 6 steps. These steps help configure the exact conditions to allow or deny access to certain areas for different users. Here's a detailed guide for each step:

Step 1 - Name
In the first step of access rule registration, you need to provide a unique description for the rule. Here are the main instructions:
- Required Fields: Fill in the description field.
- Additional Rules:
- There should be no duplicate rule descriptions.
- A success notification is displayed when returning to the record GRID.
- Internationalization is applied to all fields.
After filling in the description, you can click "Next" to proceed to the next step.
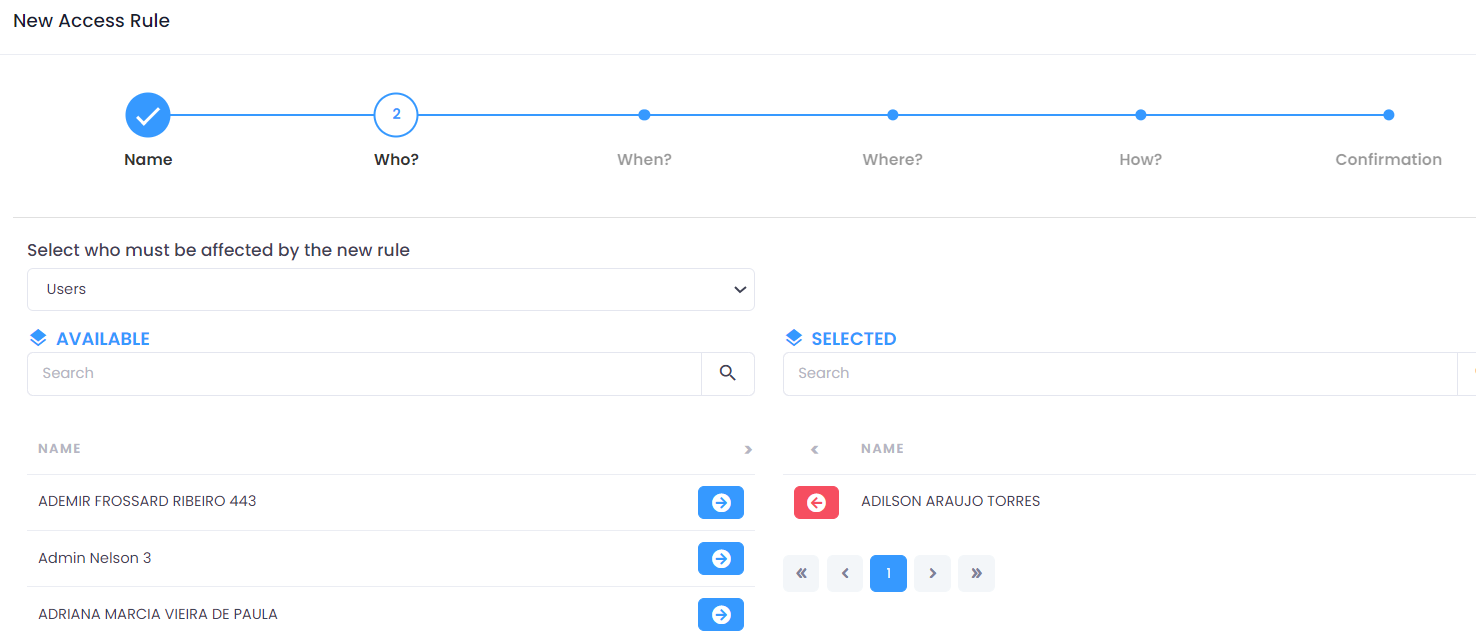
Step 2 - Who
In the second step, you associate the rule with people, groups, or types. The options include:
- People and Visitors: Associates specific individuals.
- Groups and Companies: Associates groups or companies.
- Types: Associates all or specific types of people or visitors.
The rules for this step include:
- Move records between the GRIDs to associate or disassociate.
- You cannot proceed to the next step without choosing at least one record.
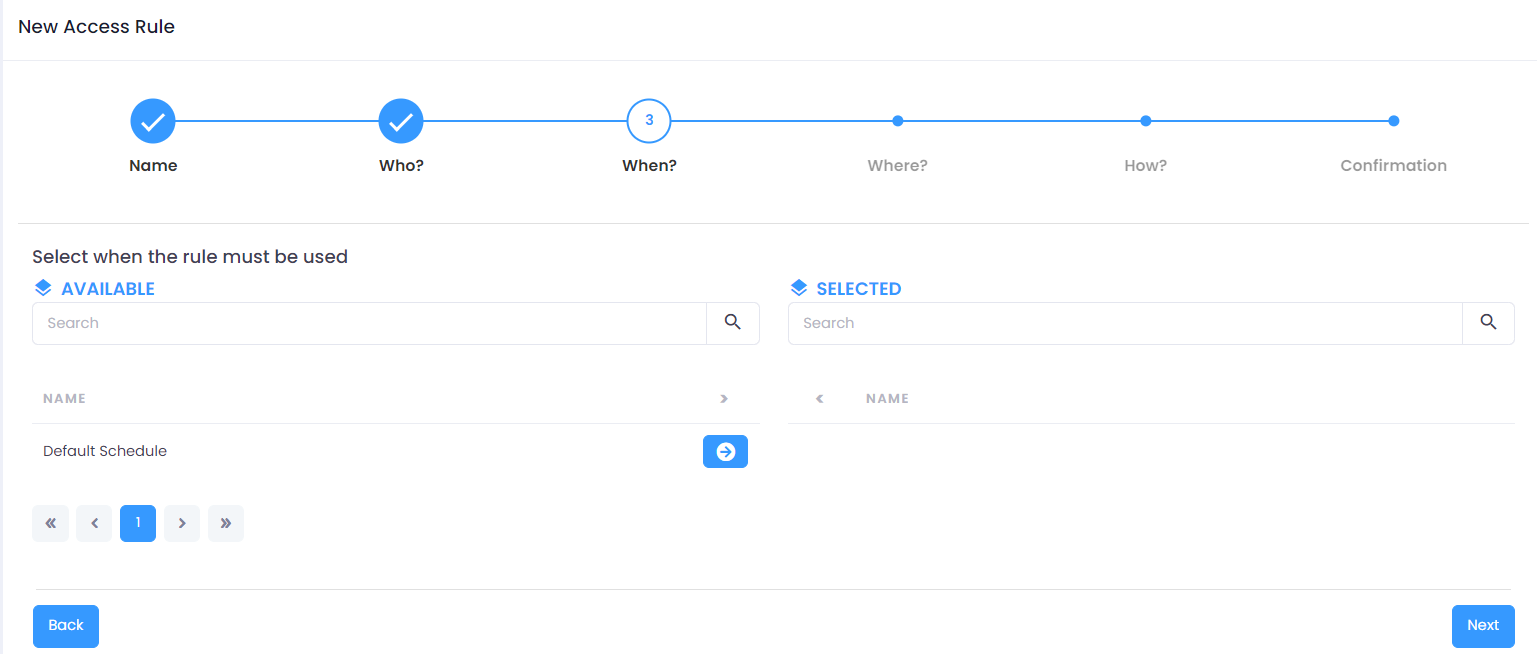
Step 3 - When
In this step, you associate schedules with the rule. The instructions include:
- Choose when the rule should be applied.
- Move records between the GRIDs to associate or disassociate.
You cannot proceed to the next step without choosing at least one schedule record.
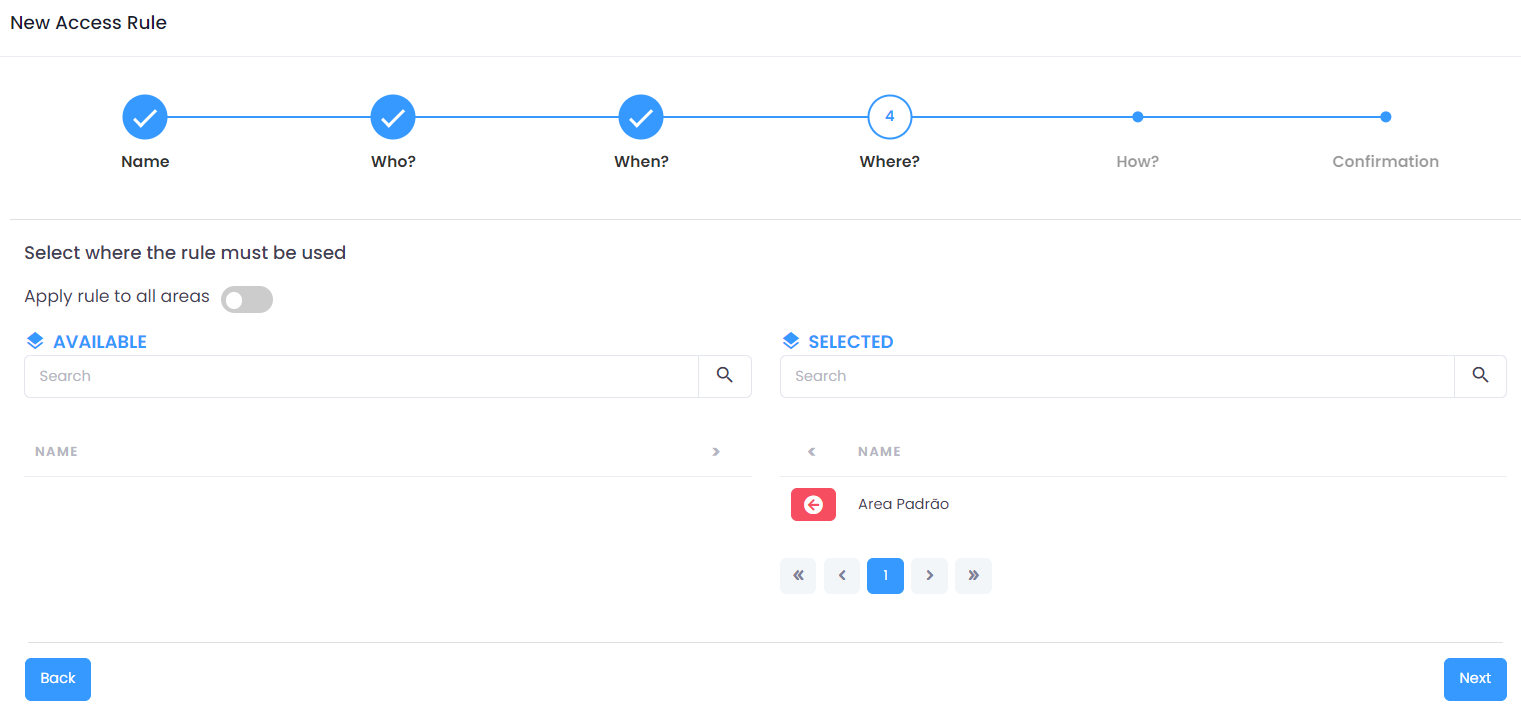
Step 4 - Where
The fourth step involves associating areas with the rule. Here are the main instructions:
- Select where the rule should be applied by choosing specific areas.
- Move records between the GRIDs to associate or disassociate.
- Activate the toggle to apply the rule to all areas.
You cannot proceed to the next step without choosing at least one area or selecting all areas.
Step 5 - How (Additional Settings)
This step is dynamic and only appears when one or more options are enabled in Settings > System > Access Tab. Here you can configure:
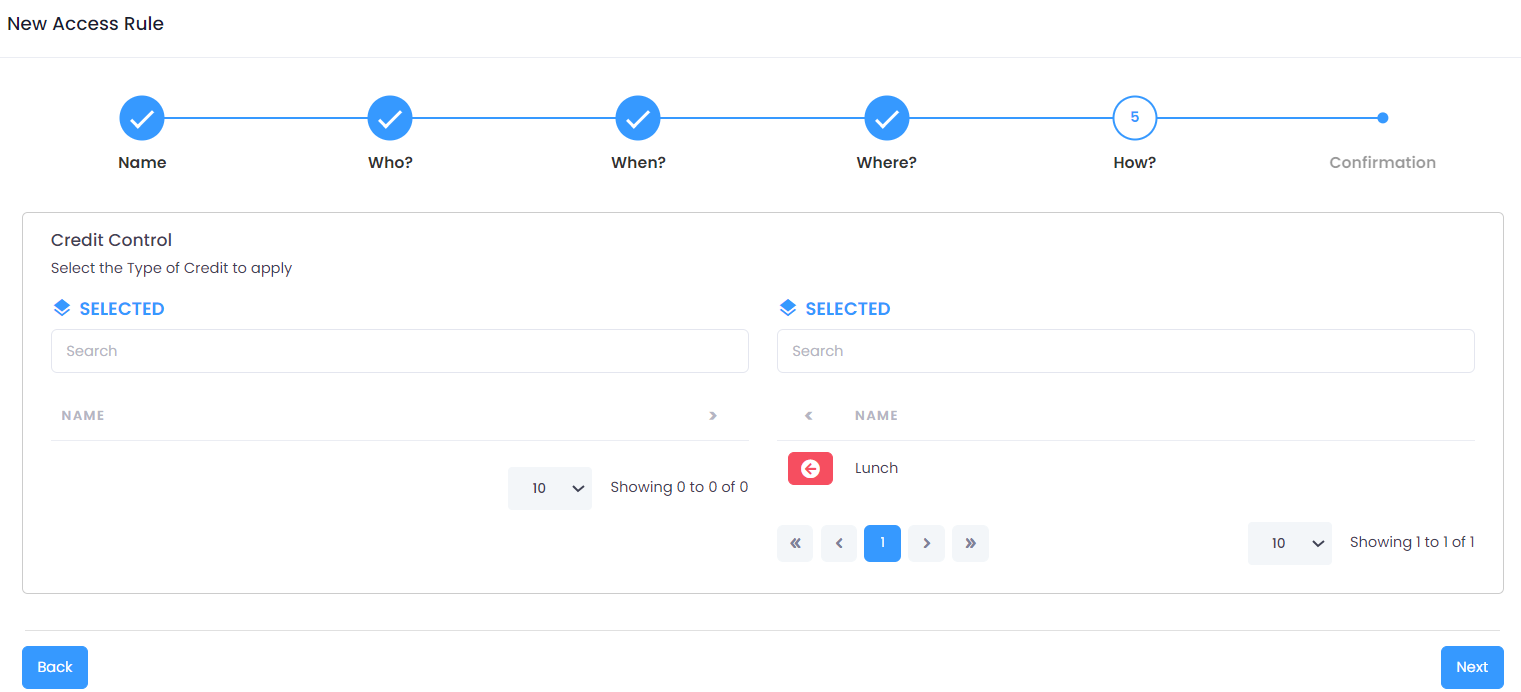
-
Enable Credit Control: When activated, links credit types to the rule. A table of available credit types will appear for selection. Each access authorized by this rule debits the corresponding credit from the user's balance.
-
Access Methods: Allows individually disabling identification methods accepted by this rule:
- Biometrics (fingerprint)
- Card
- Password
- Facial
Note: This option only appears if Access Method Settings is enabled in the System.
-
Random Security Check: When activated:
- Enter the Inspection Percentage (0–100%) — defines the probability of an access being selected for inspection.
- Enable the Inspect on exit toggle to also apply random inspection to exit events.
- Selected accesses remain pending in Access Monitoring until the operator clicks
Release.
Note: This option only appears if Enable Random Inspection is enabled in the System.
-
Re-entry Control: When activated, prevents the same person from accessing the same area repeatedly in a short period:
- Enter the Re-entry Block Period in seconds.
-
Associate Devices with Rule: When activated, displays a selector to associate specific devices with the rule, narrowing down which equipment it applies to.
Note: This option only appears if Associate Devices is enabled in the System.
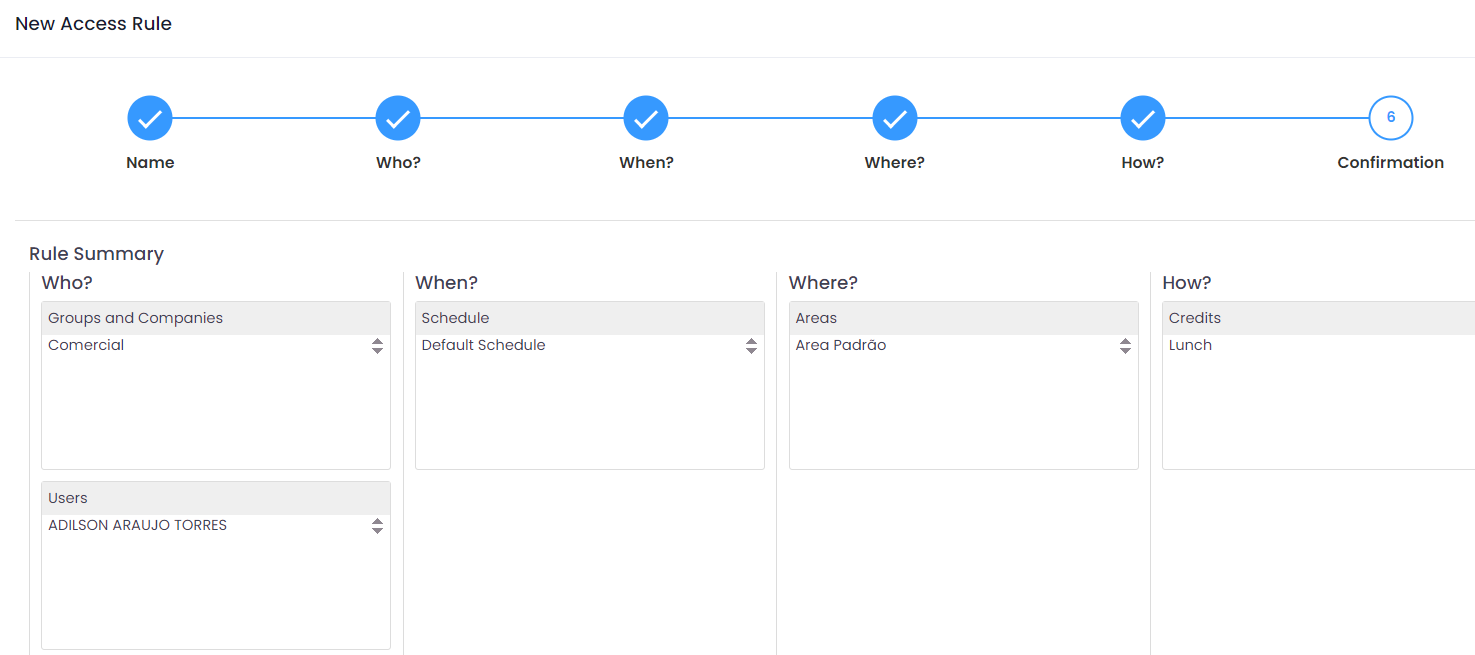
Step 6 - Confirmation
In the final step, you review and confirm the chosen settings. The system will display a summary of the configuration, showing the records selected by the user. Clicking Save will save the entire access rule registration.
Note: When there is no "How" step, the confirmation step will become step 5. The "How" step options are enabled and disabled in Settings > System > Access Tab.
Editing a Rule
To edit an existing rule, click the Pencil icon corresponding to the record you want to edit. You will be redirected to the Edit Screen, where you can make the desired modifications.
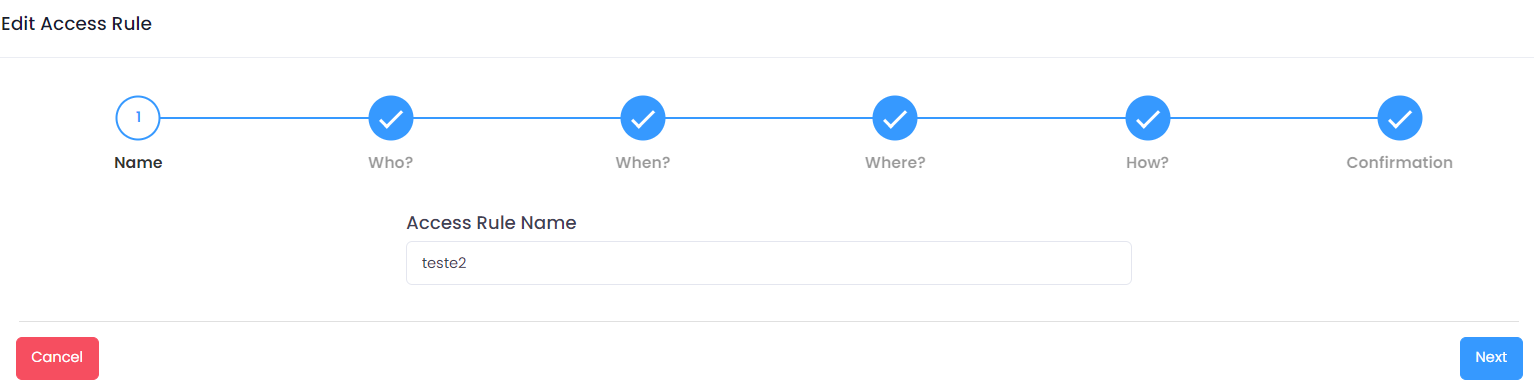
After filling in all the information and selecting the desired settings, click the Save button to confirm the registration or the changes made. If you want to cancel the operation, click the Cancel button to return to the previous screen without saving the changes.
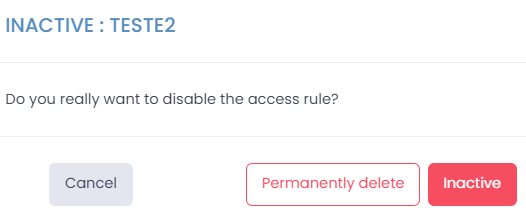
Deactivating or Deleting an Access Rule
Click the Trash icon in the row of the record you want to deactivate or delete. A dialog box will appear with two options:
- Inactive: Deactivates the selected rule, which will no longer appear in the active list but will remain in the database.
- Delete permanently: Performs a 'fake delete,' marking the record as deleted in the database without physically removing it.
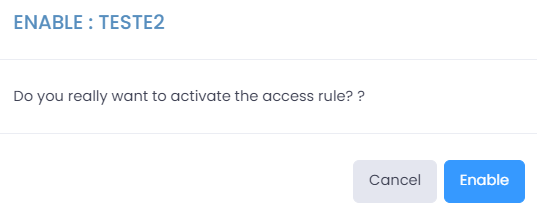
Activating an Access Rule
Activating an inactive rule is a simple process. First, filter by Inactive. This will display the list of rules that are currently inactive.
Locate the record you want to activate and click the ✔️ icon to activate it. A dialog box will appear to confirm or cancel the operation.
Selecting the Number of Records Displayed
At the bottom of the screen, use the selector to choose how many records you want to view at a time. The options are: 10, 20, 50, and 100
Viewing and Navigating Between Records
The bottom of the screen also shows the count of displayed records and the total number of registered records.
Use the pagination controls to navigate between record pages. The navigation options include:
- << and >> to go to the First or Last page.
- < and > to Advance or Go Back a page.
- [1] [2] ... [N] page indicators to click and access directly.
