Accessing the System Settings Screen
To access the system settings, navigate to the side menu and select: Settings > System.
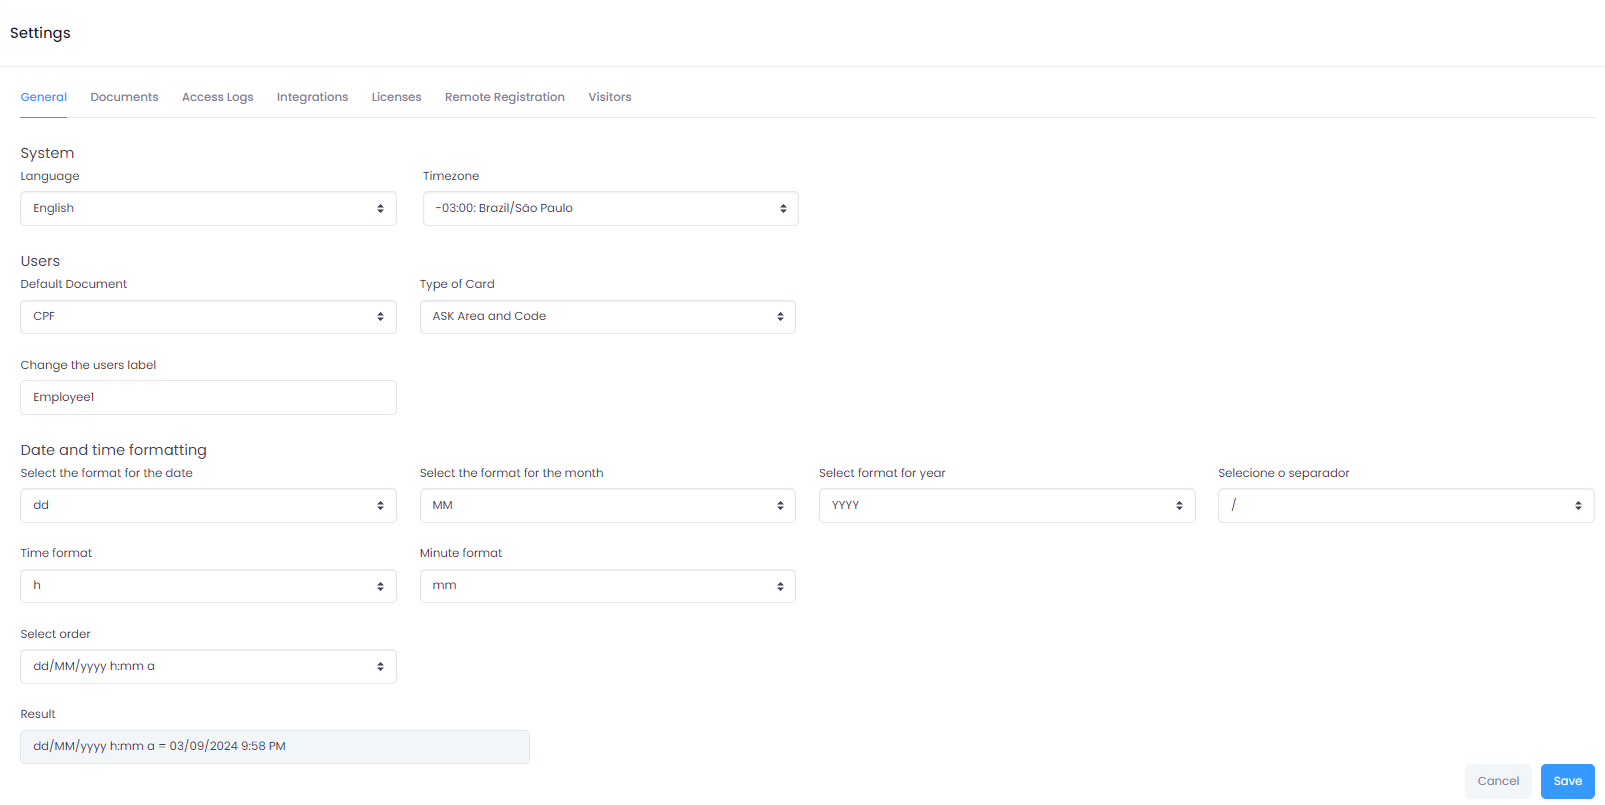
General Tab
Here you can customize general system features to suit your preferences and needs.
- Language: Select your preferred user interface language. Choose between Portuguese, English, or Spanish.
- Time Zone: Set the time zone that best suits your geographic location. This setting will affect how dates and times are displayed in the system.
- Default Document: Choose the default format for identification documents when registering new people.
- Default Card Type: Set the default card type to be used in the system.
- Display Mode: Defines how the system labels certain interface elements. Options are:
- Standard: Uses the original system labels (e.g., "People", "Visitors", "Areas").
- Condominium: Replaces labels with terms typical of condominium management.
- Custom: Allows individual customization of each label. When selected, the Labels tab is shown for detailed configuration.
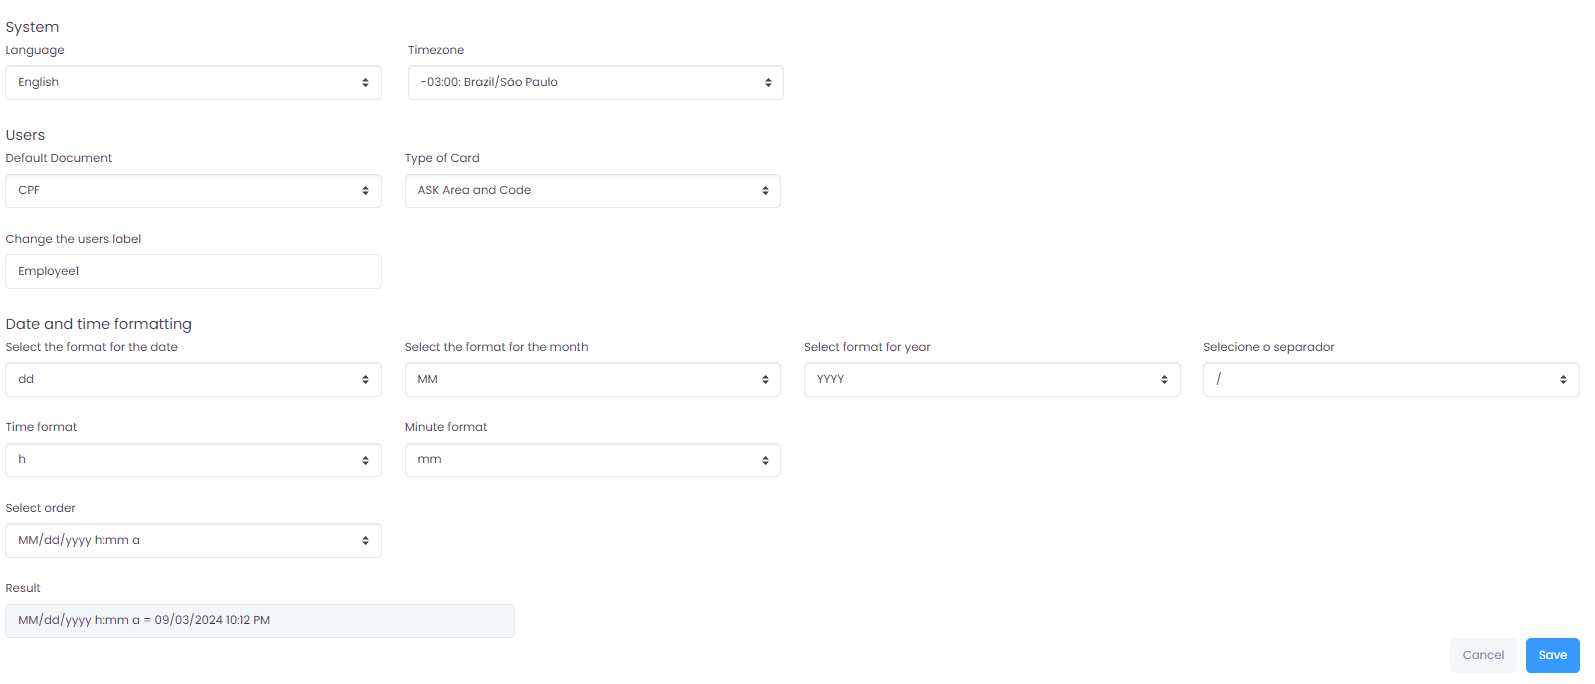
- Date and Time Formatting: Configure the default format for displaying dates and times throughout the system (separator, order, and 12h or 24h format).
- Enable parking space registration for people and visitors: When enabled, allows linking parking spaces directly to the registration of people and visitors.
- Unlink from groups/companies on deactivation: When enabled, automatically removes group and company links when a record is deactivated. You can select whether this applies to People, Visitors, or Both.
- Allow advanced management of the block list: When enabled, shows the Block List and Blocking Reasons menus in the Records module, allowing more granular control over blocks than the simple block list toggle in the individual registration.
- Master Password: When enabled, allows configuring a master password that can be used as an emergency credential on devices, regardless of normal access rules.
- Daylight Saving Time: When enabled, allows configuring start and end dates for daylight saving time. The system will automatically adjust device clocks on the configured dates.
Documents Tab
In the Documents tab, you have control over the types of documents used in the system. Here you can register new types or modify the settings of existing types.
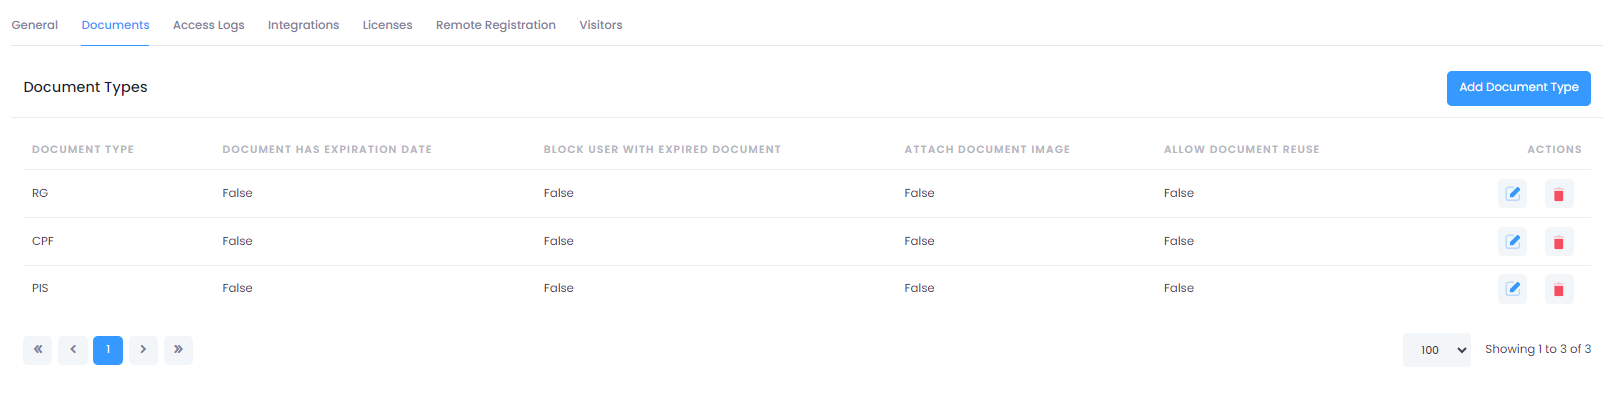
To register new document types, click on the Add Document Type button located at the top right of the screen.
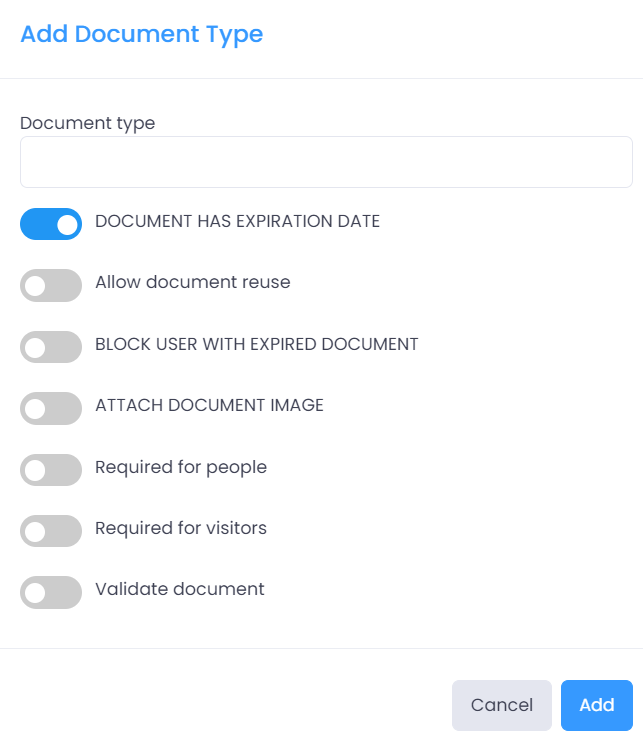
In the registration form, fill in the "Document Type" field with the desired name. Configure the available toggles:
- Document Has Expiration Date: When enabled, it makes the expiration date field mandatory when linking a document to a person or visitor.
- Block User with Expired Document: When the expiration date control toggle is enabled, this new toggle appears. It allows you to configure the system to block access for people or visitors with expired documents.
- Allow Document Reuse: When enabled, it allows the same document to be registered for different records.
- Attach Document Image: Makes attaching an image mandatory when linking a document.
- Required for People: When enabled, this document type becomes a mandatory field for registering people in the system.
- Required for Visitors: When enabled, this document type becomes a mandatory field for registering visitors in the system.
- Validate Document: When enabled, the system will automatically validate the document according to predefined rules, ensuring its correctness before allowing it to be saved.
After filling in the fields and configuring the settings as desired, click the Add button to add the new document type or Cancel to cancel.
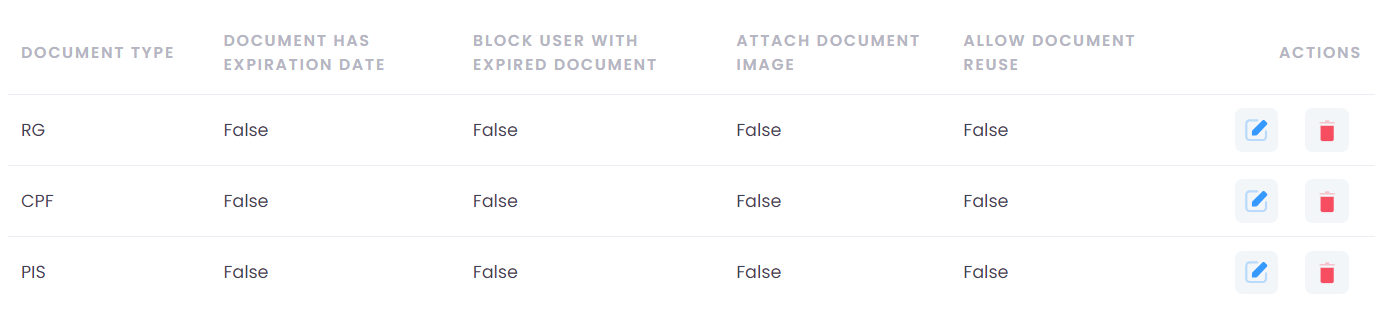
To edit a document type, click the Pencil icon corresponding to the record you want to edit. To delete it, click the Trash icon in the row of the record you want to delete.
Access Tab
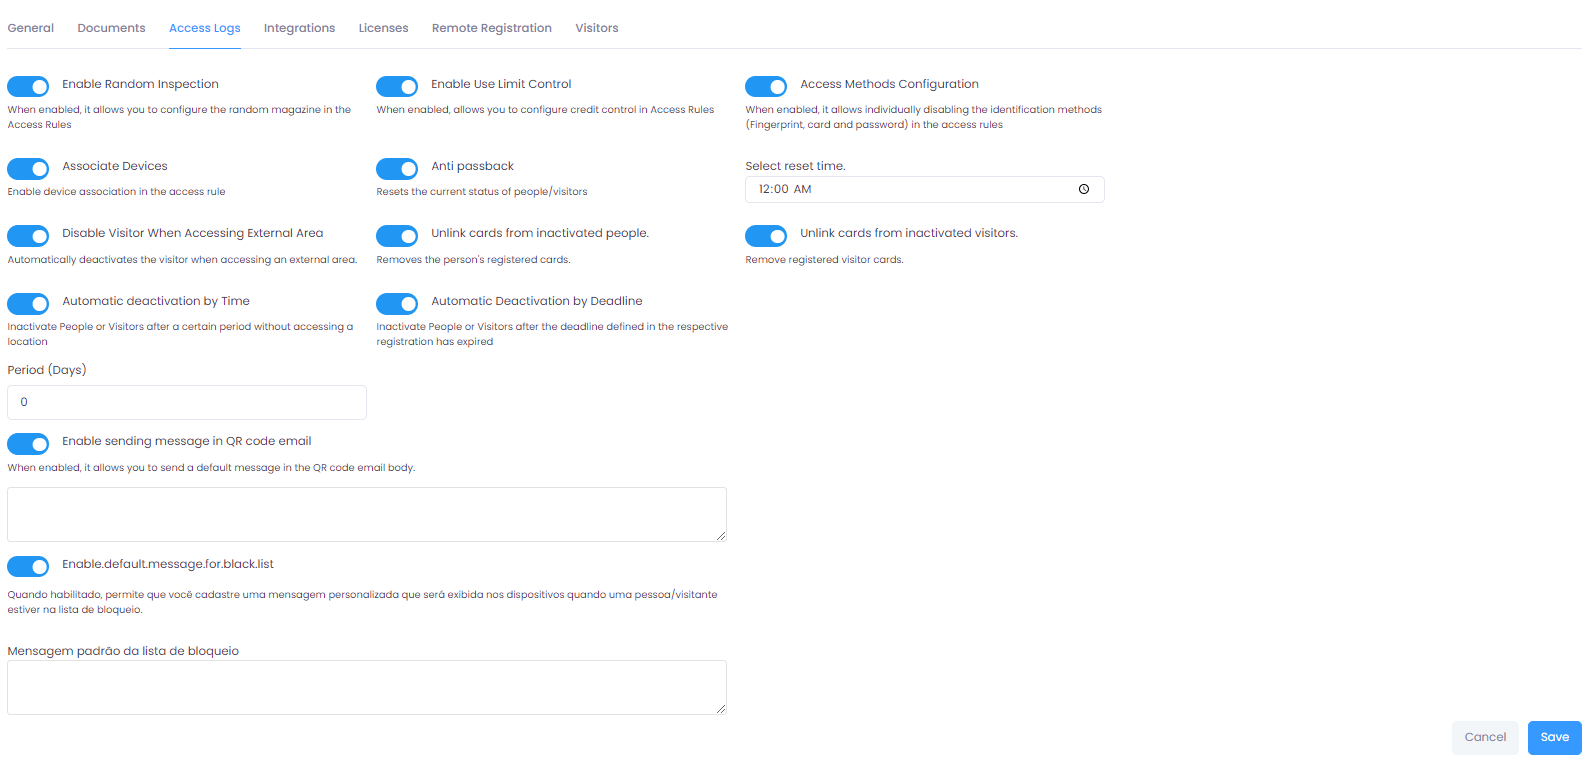
In the "Access" tab, you will find various system controls:
- Enable Random Inspection: When enabled, allows you to configure random inspections in Access Rules. An inspection percentage field becomes available in the access rules configuration.
- Associate Devices: Enables the association of devices per area in access rules.
- Deactivate Visitor When Accessing External Area: Automatically deactivates the visitor when accessing an area marked as "External Area."
- Automatic Deactivation by Period: Deactivates records after a specified number of days without any access. Specify the number of days in the field and select the target: People, Visitors, or Both.
- Automatic Deactivation after Document Expiration: When enabled, automatically deactivates records whose primary document has expired. Select the target: People, Visitors, or Both.
- Enable Credit Control: When enabled, allows you to configure credit control in Access Rules.
- Anti-Passback Reset: Resets the anti-passback status of people/visitors at a fixed daily time. Specify the reset time in the field.
- Unlink Cards from Deactivated People: Automatically removes registered cards when a person is deactivated.
- Access Method Configurations: When enabled, allows you to individually disable identification methods (Fingerprint, Card, and Password) in access rules.
- Unlink Cards from Deactivated Visitors: Automatically removes registered cards when a visitor is deactivated.
- Enable QR Code Email Message: When enabled, displays a text field to configure the default message included in the QR Code invitation email.
- Enable Default Message for Block List: When enabled, displays a text field to configure the custom message shown on devices when a person/visitor is on the block list.
Integrations Tab

In the "Integrations" tab, you can configure external integrations:
-
Webhook Integration: When enabled, allows real-time communication with external systems via HTTP requests. After enabling, fill in the Webhook URL field with the endpoint that will receive events from iDSecure Cloud. Make sure the URL is accessible and properly configured to process the requests.
-
SAML / Active Directory Login (SSO): When enabled, allows operators to log into iDSecure using an Active Directory account via the SAML 2.0 protocol. After enabling:
- Fill in the SAML Provider URL field with your Identity Provider server address.
- The Access URL field will be automatically generated — copy this address and configure it as the Assertion Consumer Service (return URL) in your identity provider.
- Save the settings and instruct operators to use the SSO button on the login screen.
Note: SAML/AD integration requires the identity provider to be properly configured by your IT administrator before being enabled in iDSecure.
Licenses Tab
In this section, you will have a comprehensive view of license usage in the system, allowing you to monitor the total licenses available and the number in use. This information is crucial to ensure that your system is in compliance with the acquired licenses and that there is no overuse.
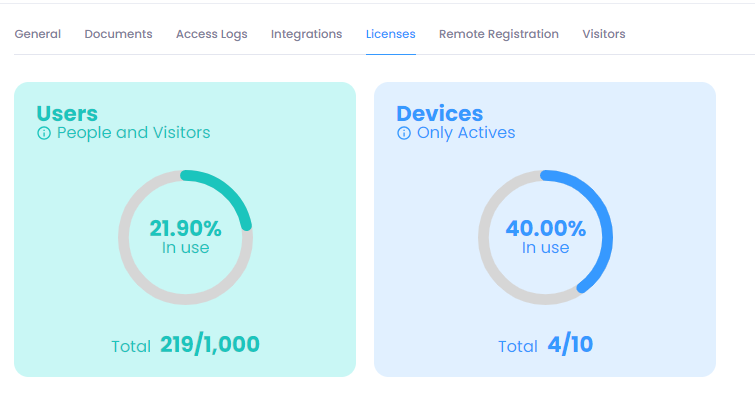
When accessing the "Licenses" tab, you will find the following indicators:
Total Licenses: Represents the total number of licenses acquired for the system.
Licenses in Use: Indicates how many licenses are currently in use, reflecting the number of users or devices actively using the system.
Remote Registration Tab
In the "Remote Registration" tab, you configure the mandatory fields and behavior of the remote registration link sent to visitors.
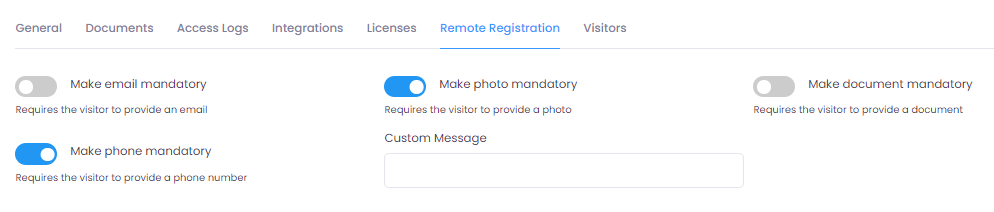
Mandatory fields in the remote registration form:
- Make Email Mandatory: Requires visitors to provide an email address.
- Make Photo Mandatory: Requires visitors to upload a photo.
- Make Document Mandatory: Requires visitors to provide an identification document.
- Make Phone Mandatory: Requires visitors to provide a phone number.
Remote registration link behavior:
- Disable Remote Registration Link After Use: When enabled, the registration link sent to the visitor expires after being used once. Useful to prevent link reuse.
- Remote Registration Link Expiration: Sets the link validity time in minutes. Leave blank for a link with no expiration.
Custom messages:
- Remote Registration Message: Text displayed to the visitor on the remote registration screen.
- Default Email Message: Custom text included in the body of the registration invitation email.
- Default WhatsApp Message: Custom text included in the WhatsApp registration invitation message.
Visitors Tab
In the "Visitors" tab, you will find settings related to the control of visits in the system.
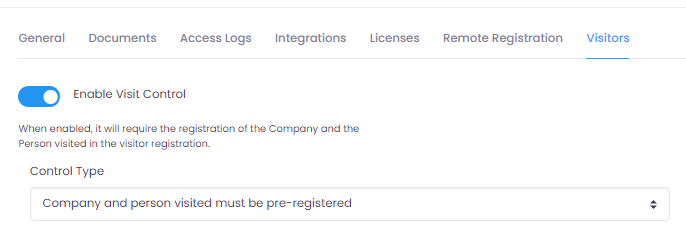
- Enable Visit Control: When enabled, the company and person visited fields are shown in visitor registration. After enabling, choose the mode:
- Allow Free Text Entry for the Person Visited: Users can freely type the name of the person being visited.
- Company and Person Visited Must Be Pre-Registered: The person visited must be selected from the system's registered people, preventing typing errors.
- Exclude from deactivation when accessing external area: When enabled, visitors who access an external area will not be automatically deactivated, even if automatic deactivation on external area access is enabled in the Access settings.
- Declare that information is true: When enabled, displays a declaration checkbox in the visitor's remote registration form, requiring them to confirm that the provided information is accurate.
Labels Tab
Note: This tab is only shown when the Display Mode in the General Tab is set to Custom.
In the "Labels" tab, you can customize the labels used throughout the system to match your organization's terminology. Available fields include:
- People Label — replaces "People" in menus, lists, and forms.
- Visitors Label — replaces "Visitors" throughout the system.
- Areas Label — replaces "Areas" throughout the system.
- Companies Label — replaces "Companies" throughout the system.
- Groups Label — replaces "Groups" throughout the system.
Saving a Configuration
After making the desired settings, click the Save button to confirm the changes. If you wish to cancel the operation, click the Cancel button to return to the previous screen without saving the changes.