Accessing the Data Import Screen
To import people or visitor registrations in bulk from files, navigate via the side menu: Records > Import.

Overview
The Import Center allows you to register or update people and visitors in bulk from CSV, Excel (XLSX), or compressed (.zip) files containing data and photos. The process is asynchronous: after submitting the file, the system processes the data in the background and displays the result under Import > Import Status.
Import Types
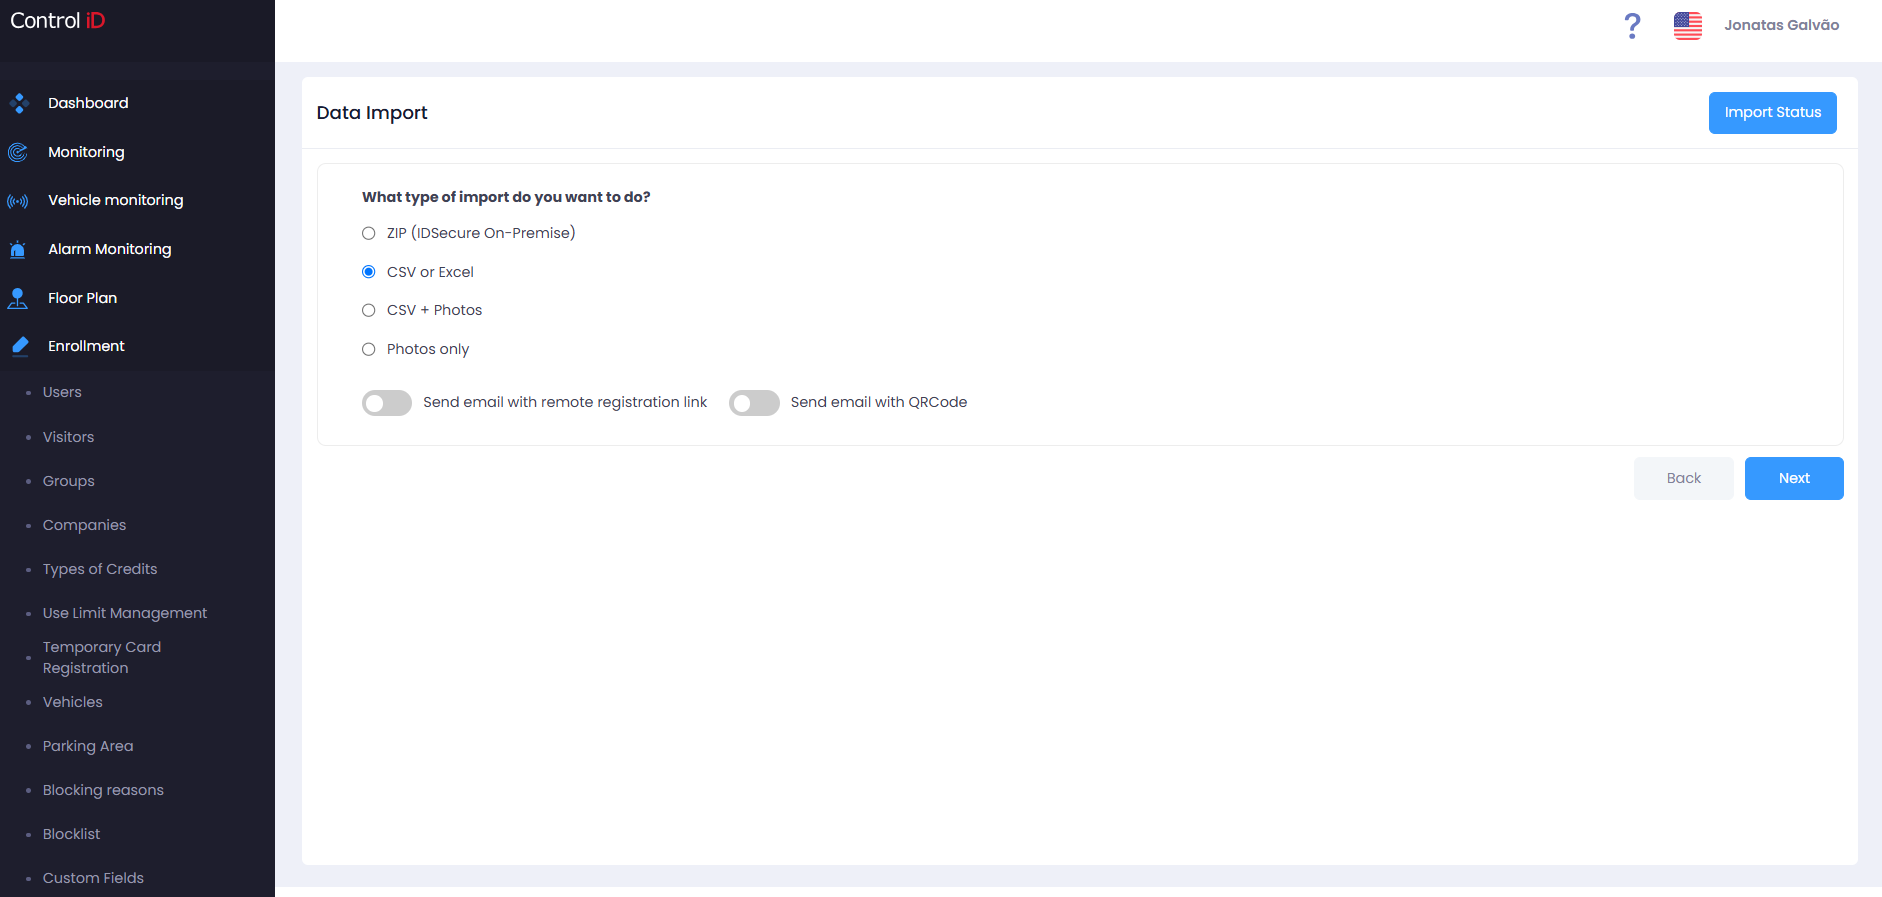
When starting an import, select the type of file to be used:
- ZIP (IDSecure On-Premise): Compressed file generated by a local iDSecure installation.
- CSV or Excel: Comma-separated values (
.csv) file or Excel spreadsheet (.xlsx) with registration data. - CSV + Photos: CSV file accompanied by a
.zipfile containing registration photos. - Photos Only:
.zipfile with photos to be associated with existing registrations. - XLSX Only: Plain Excel spreadsheet (
.xlsx). - XLSX + Photos: Excel spreadsheet accompanied by a
.zipfile with photos.
Performing an Import
The import process is carried out in steps:
Step 1 — Type Selection
Select the desired import type and click Next.
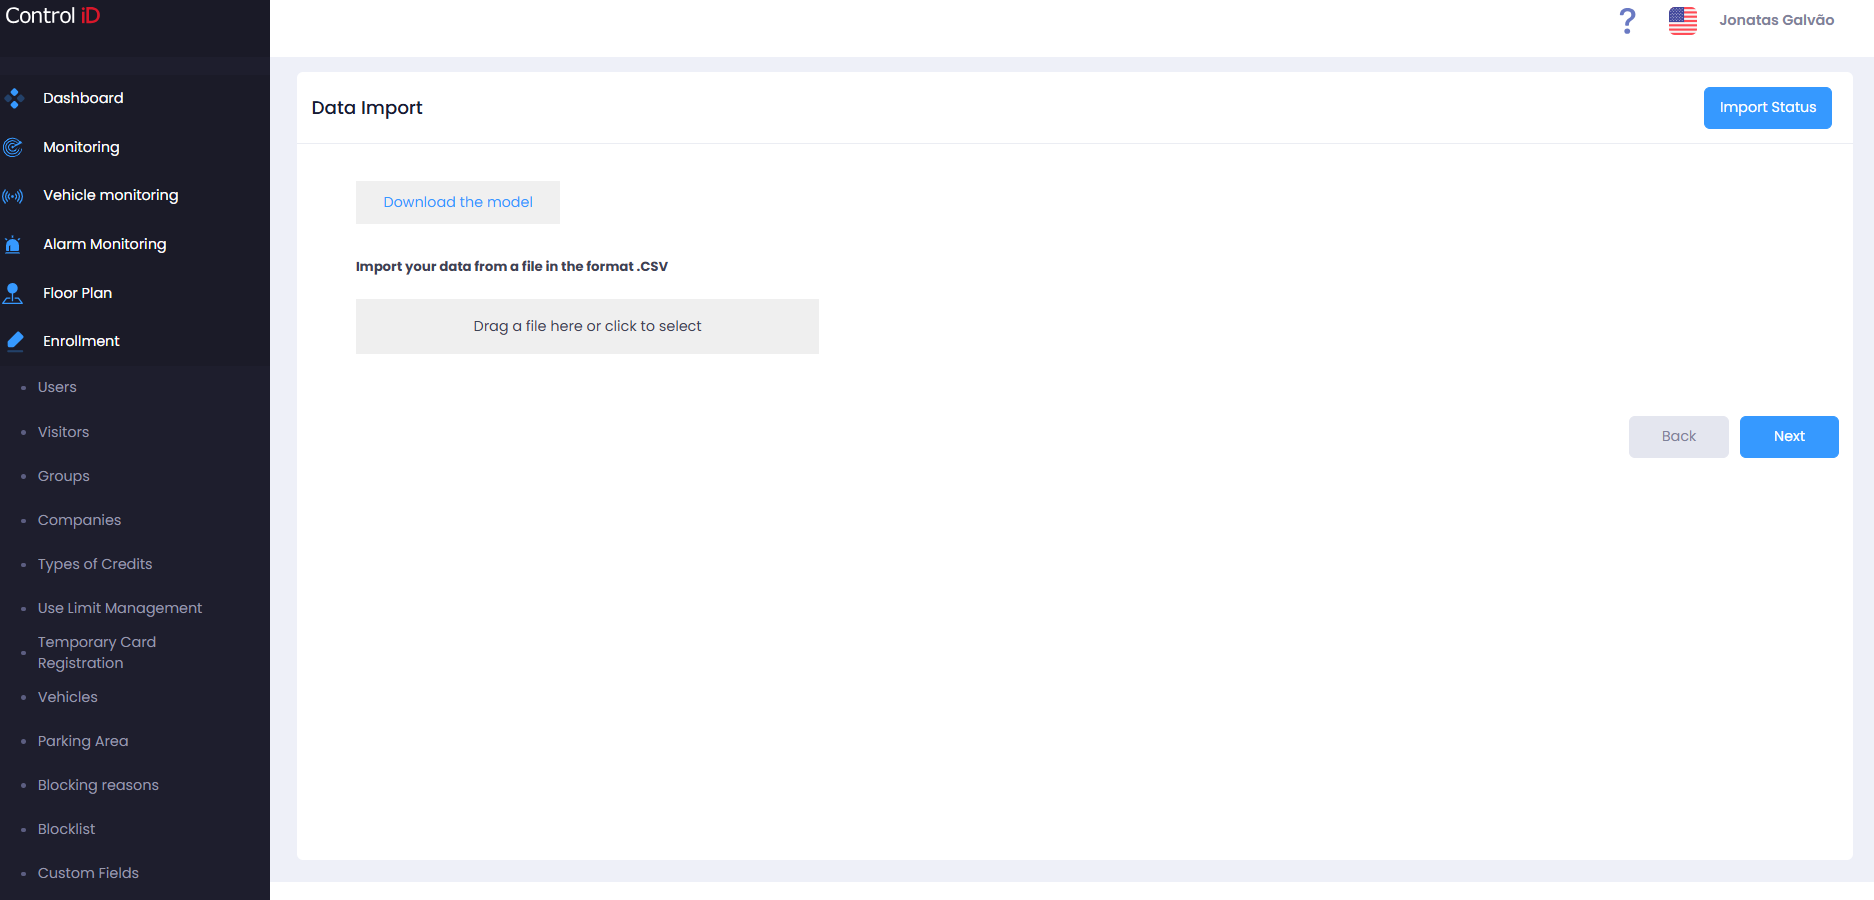
Step 2 — File Upload
- Click the upload area or drag the file to the indicated box.
- If you need a file template, click
Download the modelto get a sample file with the supported fields. - After selecting the file, click
Next.
Step 3 — Column Mapping
The system automatically identifies the file columns and maps them to iDSecure fields. Review the mapping and, if necessary, manually adjust unidentified fields. Fields that should not be imported can be marked as Do not import this field.
If the file contains photos, select the identification type in photos (e.g., Employee ID, Name) so the system correctly associates each photo with the right registration.
Step 4 — Import Mode
Define how existing data should be handled:
- Import and Replace: Existing records will be completely replaced by the file data. Fields not present in the file will be deleted.
- Import and Update: Only the fields included in the file will be updated. Other fields of existing records will be preserved.
- Partial Import (do not remove existing data): When enabled, only fields present in the file will be updated. Existing data not in the file will not be removed.
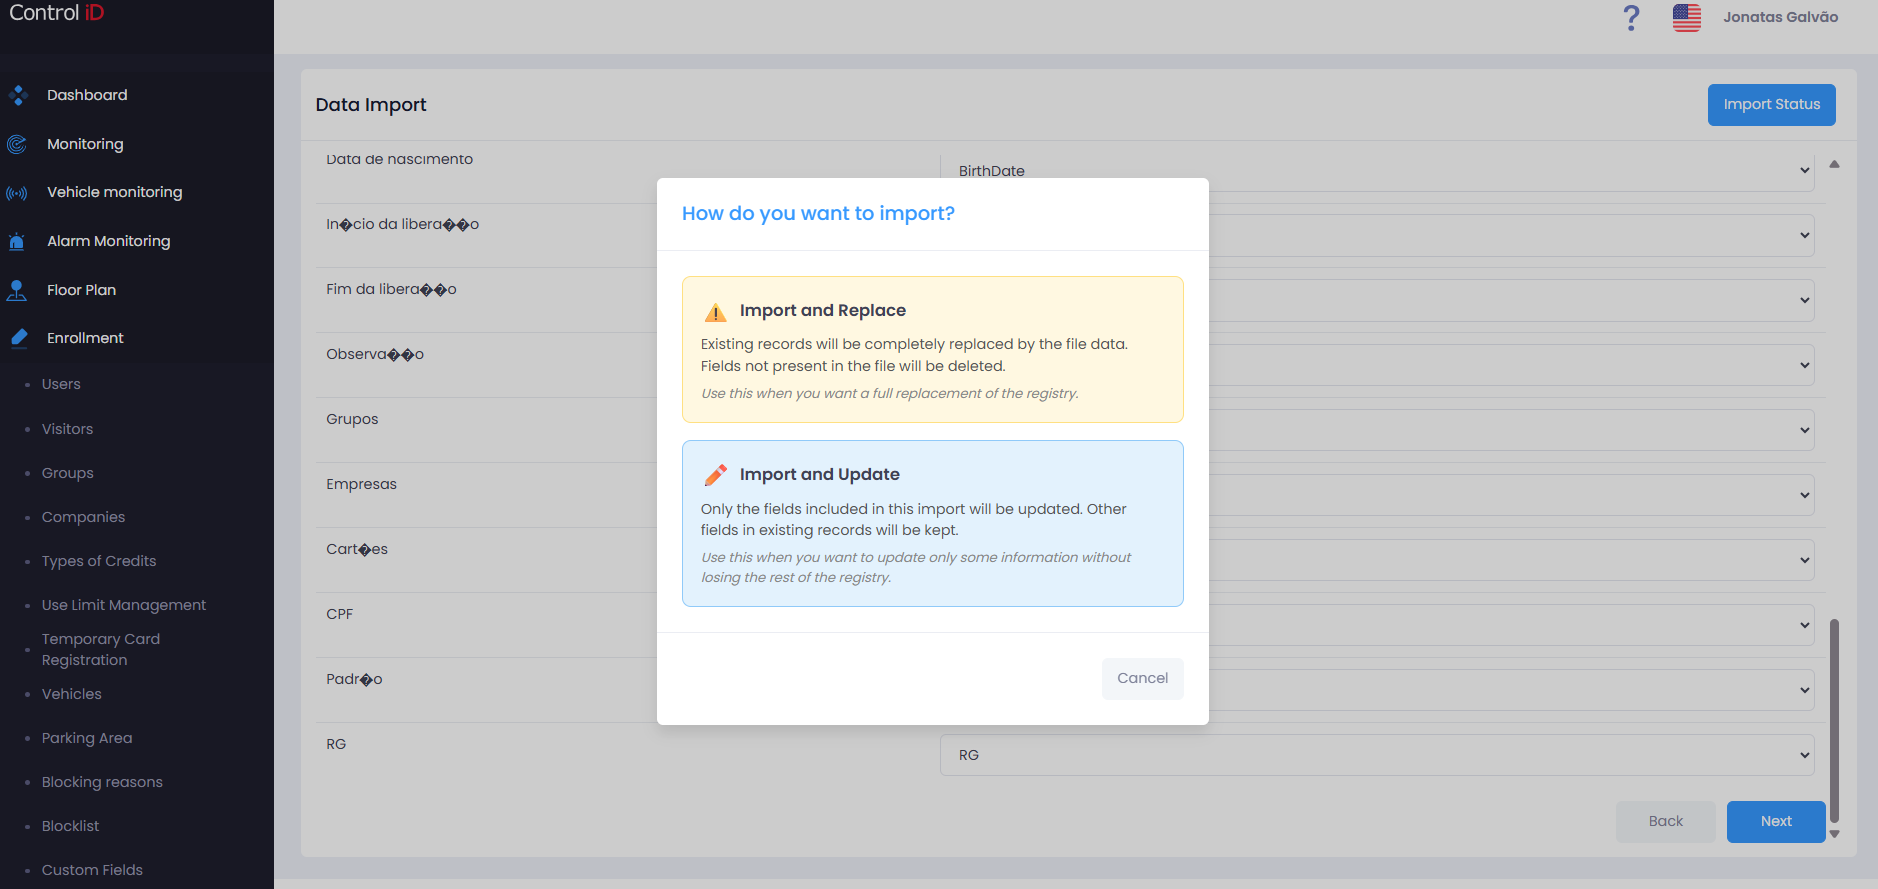
After selecting the mode, click Submit to start the import.
Step 5 — Processing
The file is sent to the server and processing occurs in the background. A confirmation message will be displayed on screen. Track progress under Records > Import > Import Status.
Note: For large files, processing may take a few minutes. Do not close the browser while the file is being submitted.
Supported Import Fields
The main fields accepted by the import file include:
- Personal data: Name, Employee ID, Email, CPF, RG, PIS, Date of Birth, Admission Date, Gender, Phone, Address.
- Professional: Position/Profession, Department.
- Access: Start and end date of authorization (for visitors), person type.
- Credentials: Cards, PIN, custom device code.
- Associations: Groups, Companies.
- Special: Notes, inactive flag, QR Code, exception list, block list.
Tracking Import Status
To check the result of a completed import, navigate to Records > Import > Import Status (or click the link shown after submitting the file).
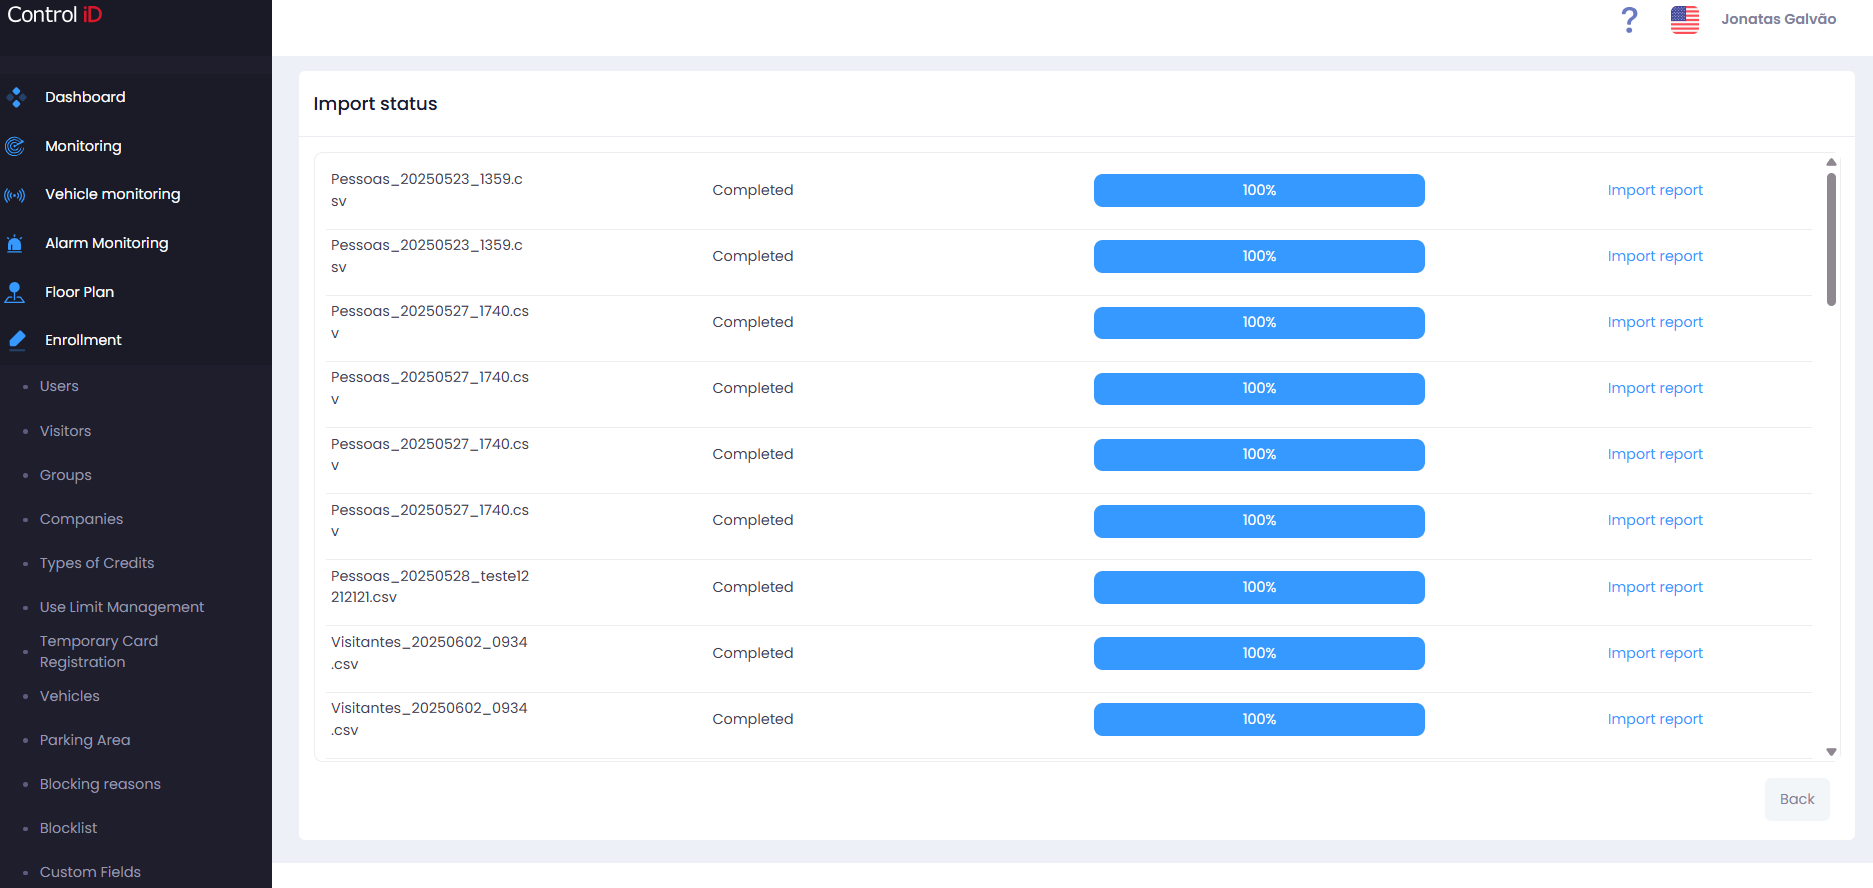
The status screen displays:
- Date/Time: When the import was started.
- Type: Import type performed.
- Status: Processing, Completed, or Error.
- Result: Number of records imported successfully, with warnings, or with errors.
- Report: Link to download the detailed import report.
Note: In case of errors in specific records, the import report details which rows had a problem and the reason. All records without errors are imported normally.